

How to set up a Mintlify integration
Setting up a Mintlify integration is easy!
The Mintlify integration works by connecting LaunchBrightly to the GitHub repository that contains your Mintlify documentation. This allows LaunchBrightly to automatically keep your product screenshots in sync with your Mintlify docs.
Note
If your Mintlify docs repository belongs to a GitHub organization, only an organization owner can install and authorize the GitHub App. GitHub restricts the installation of third-party apps to organization owners to ensure that only authorized individuals can grant external tools access to organization repositories. See GitHub's documentation for more details.
To set up the integration, navigate to the Settings page in LaunchBrightly:
Select Add integration
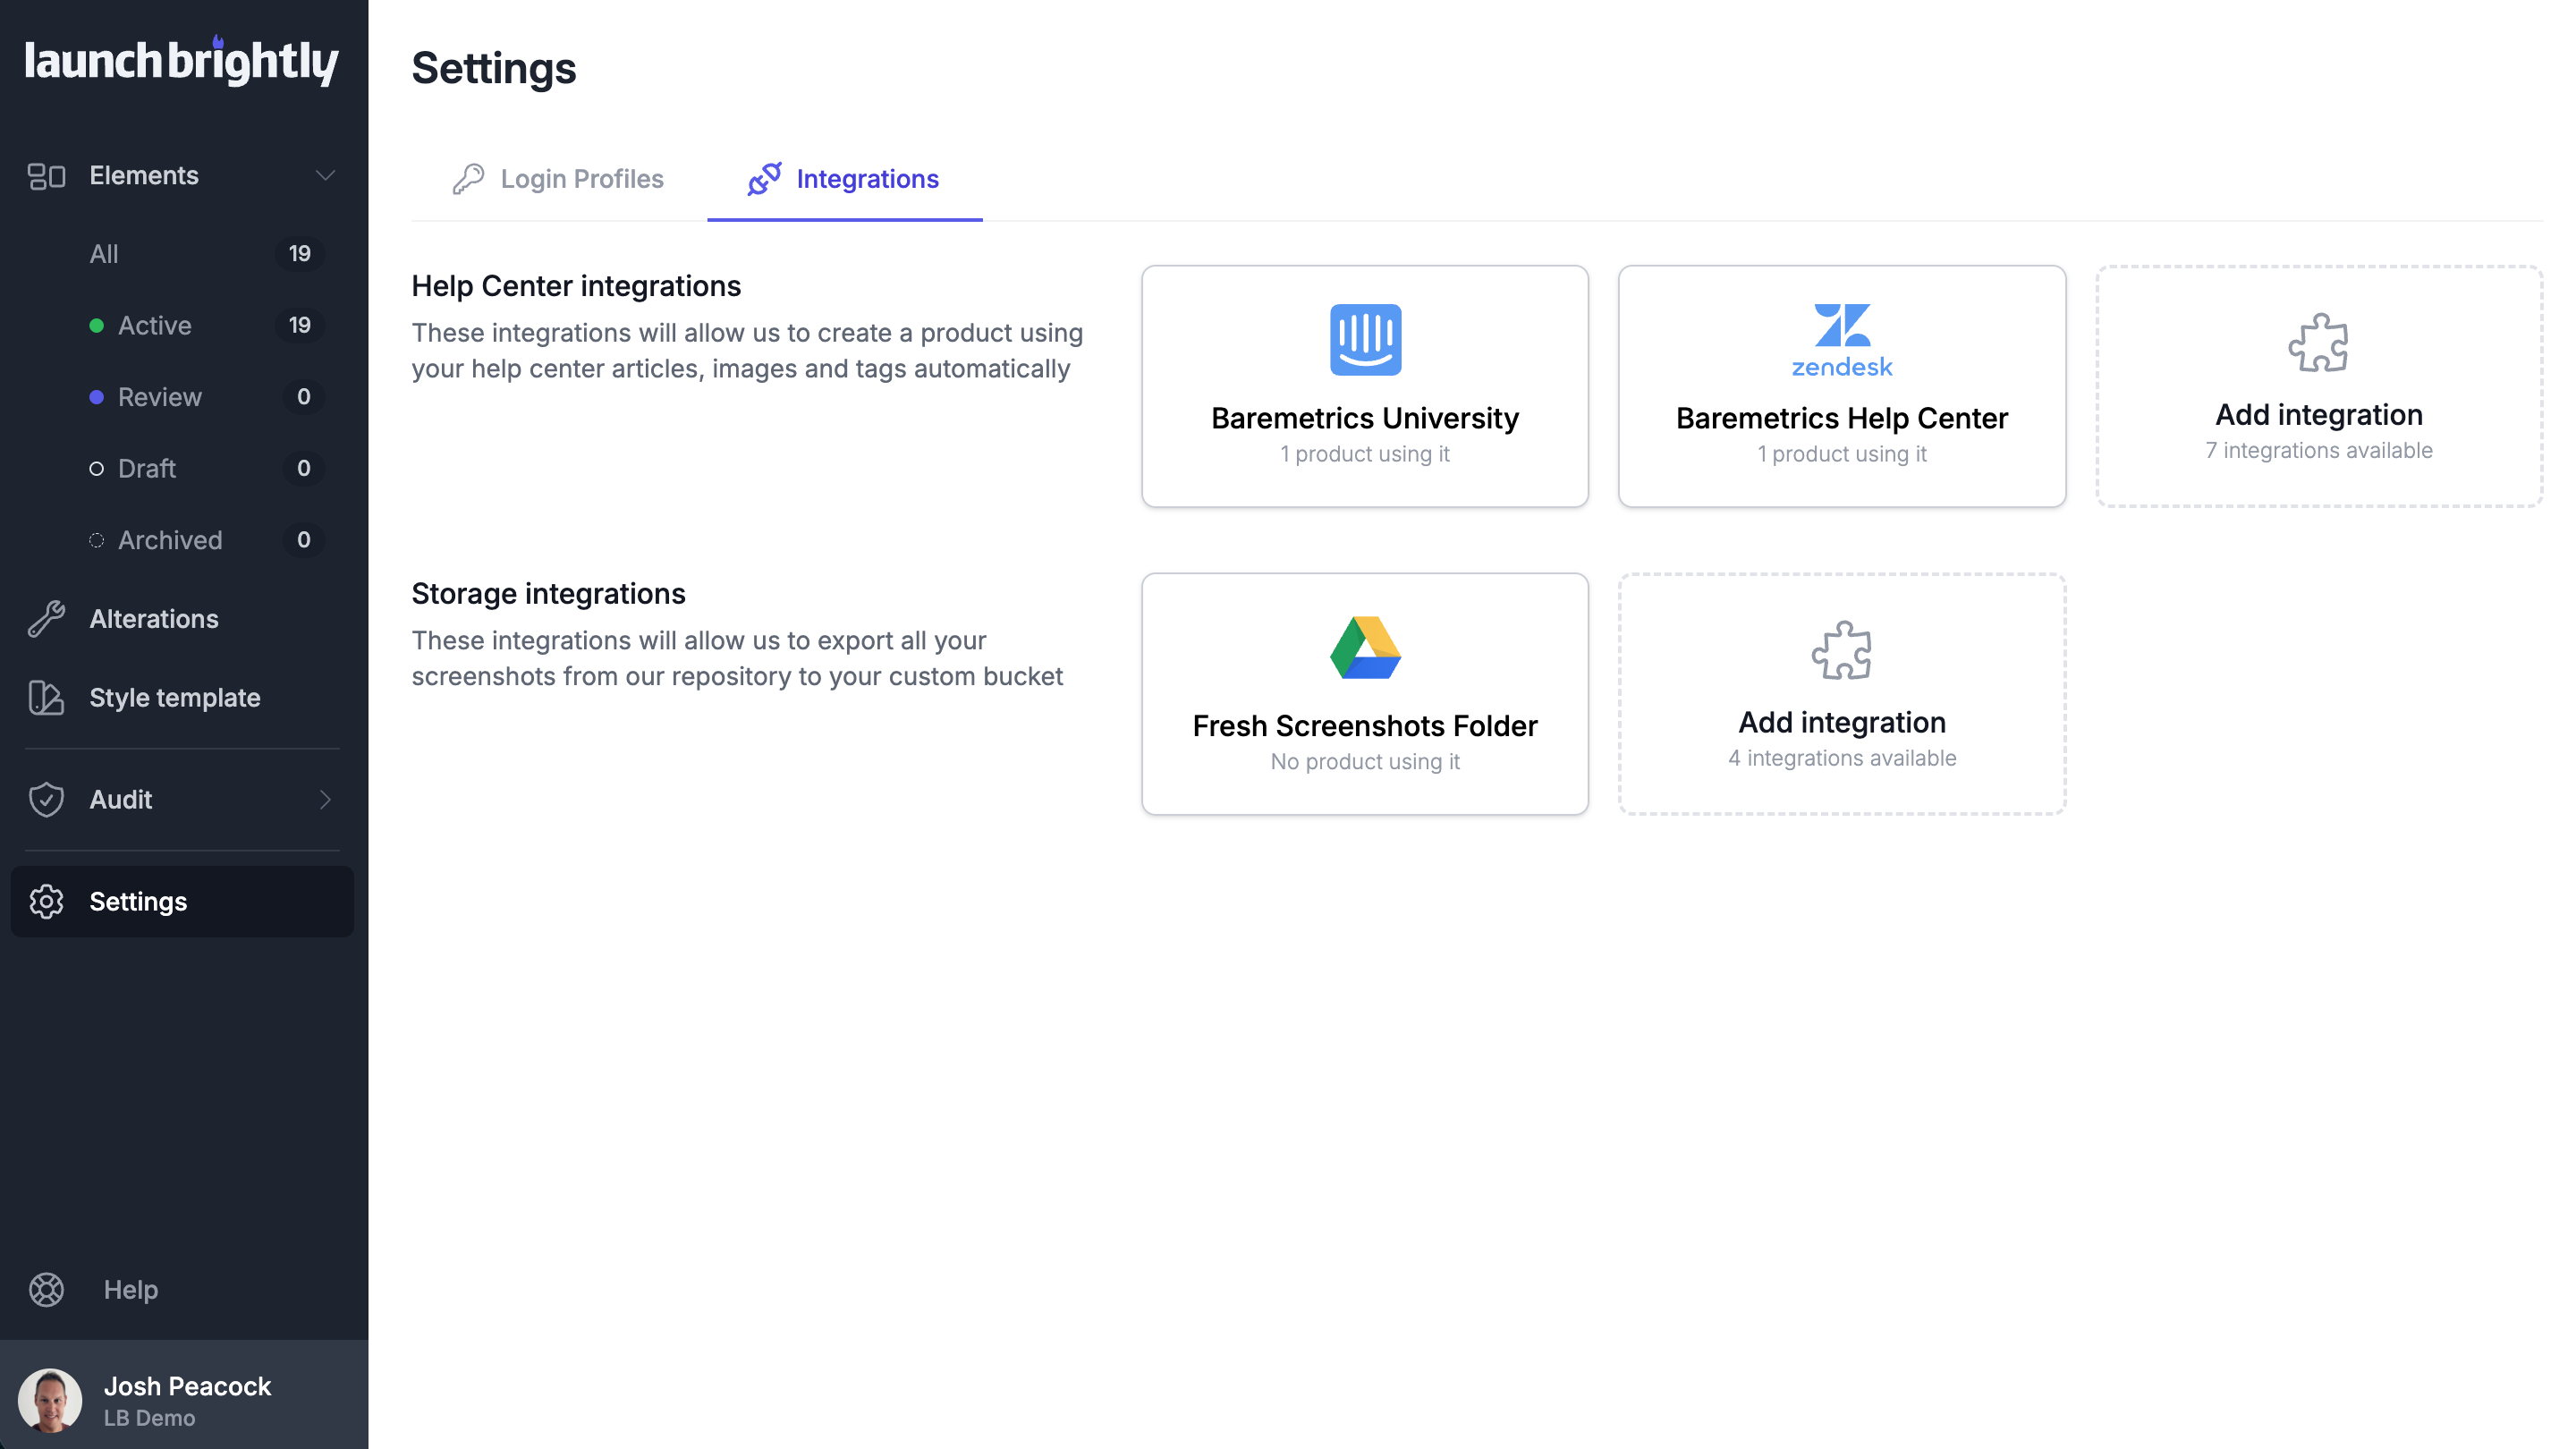
Select Mintlify
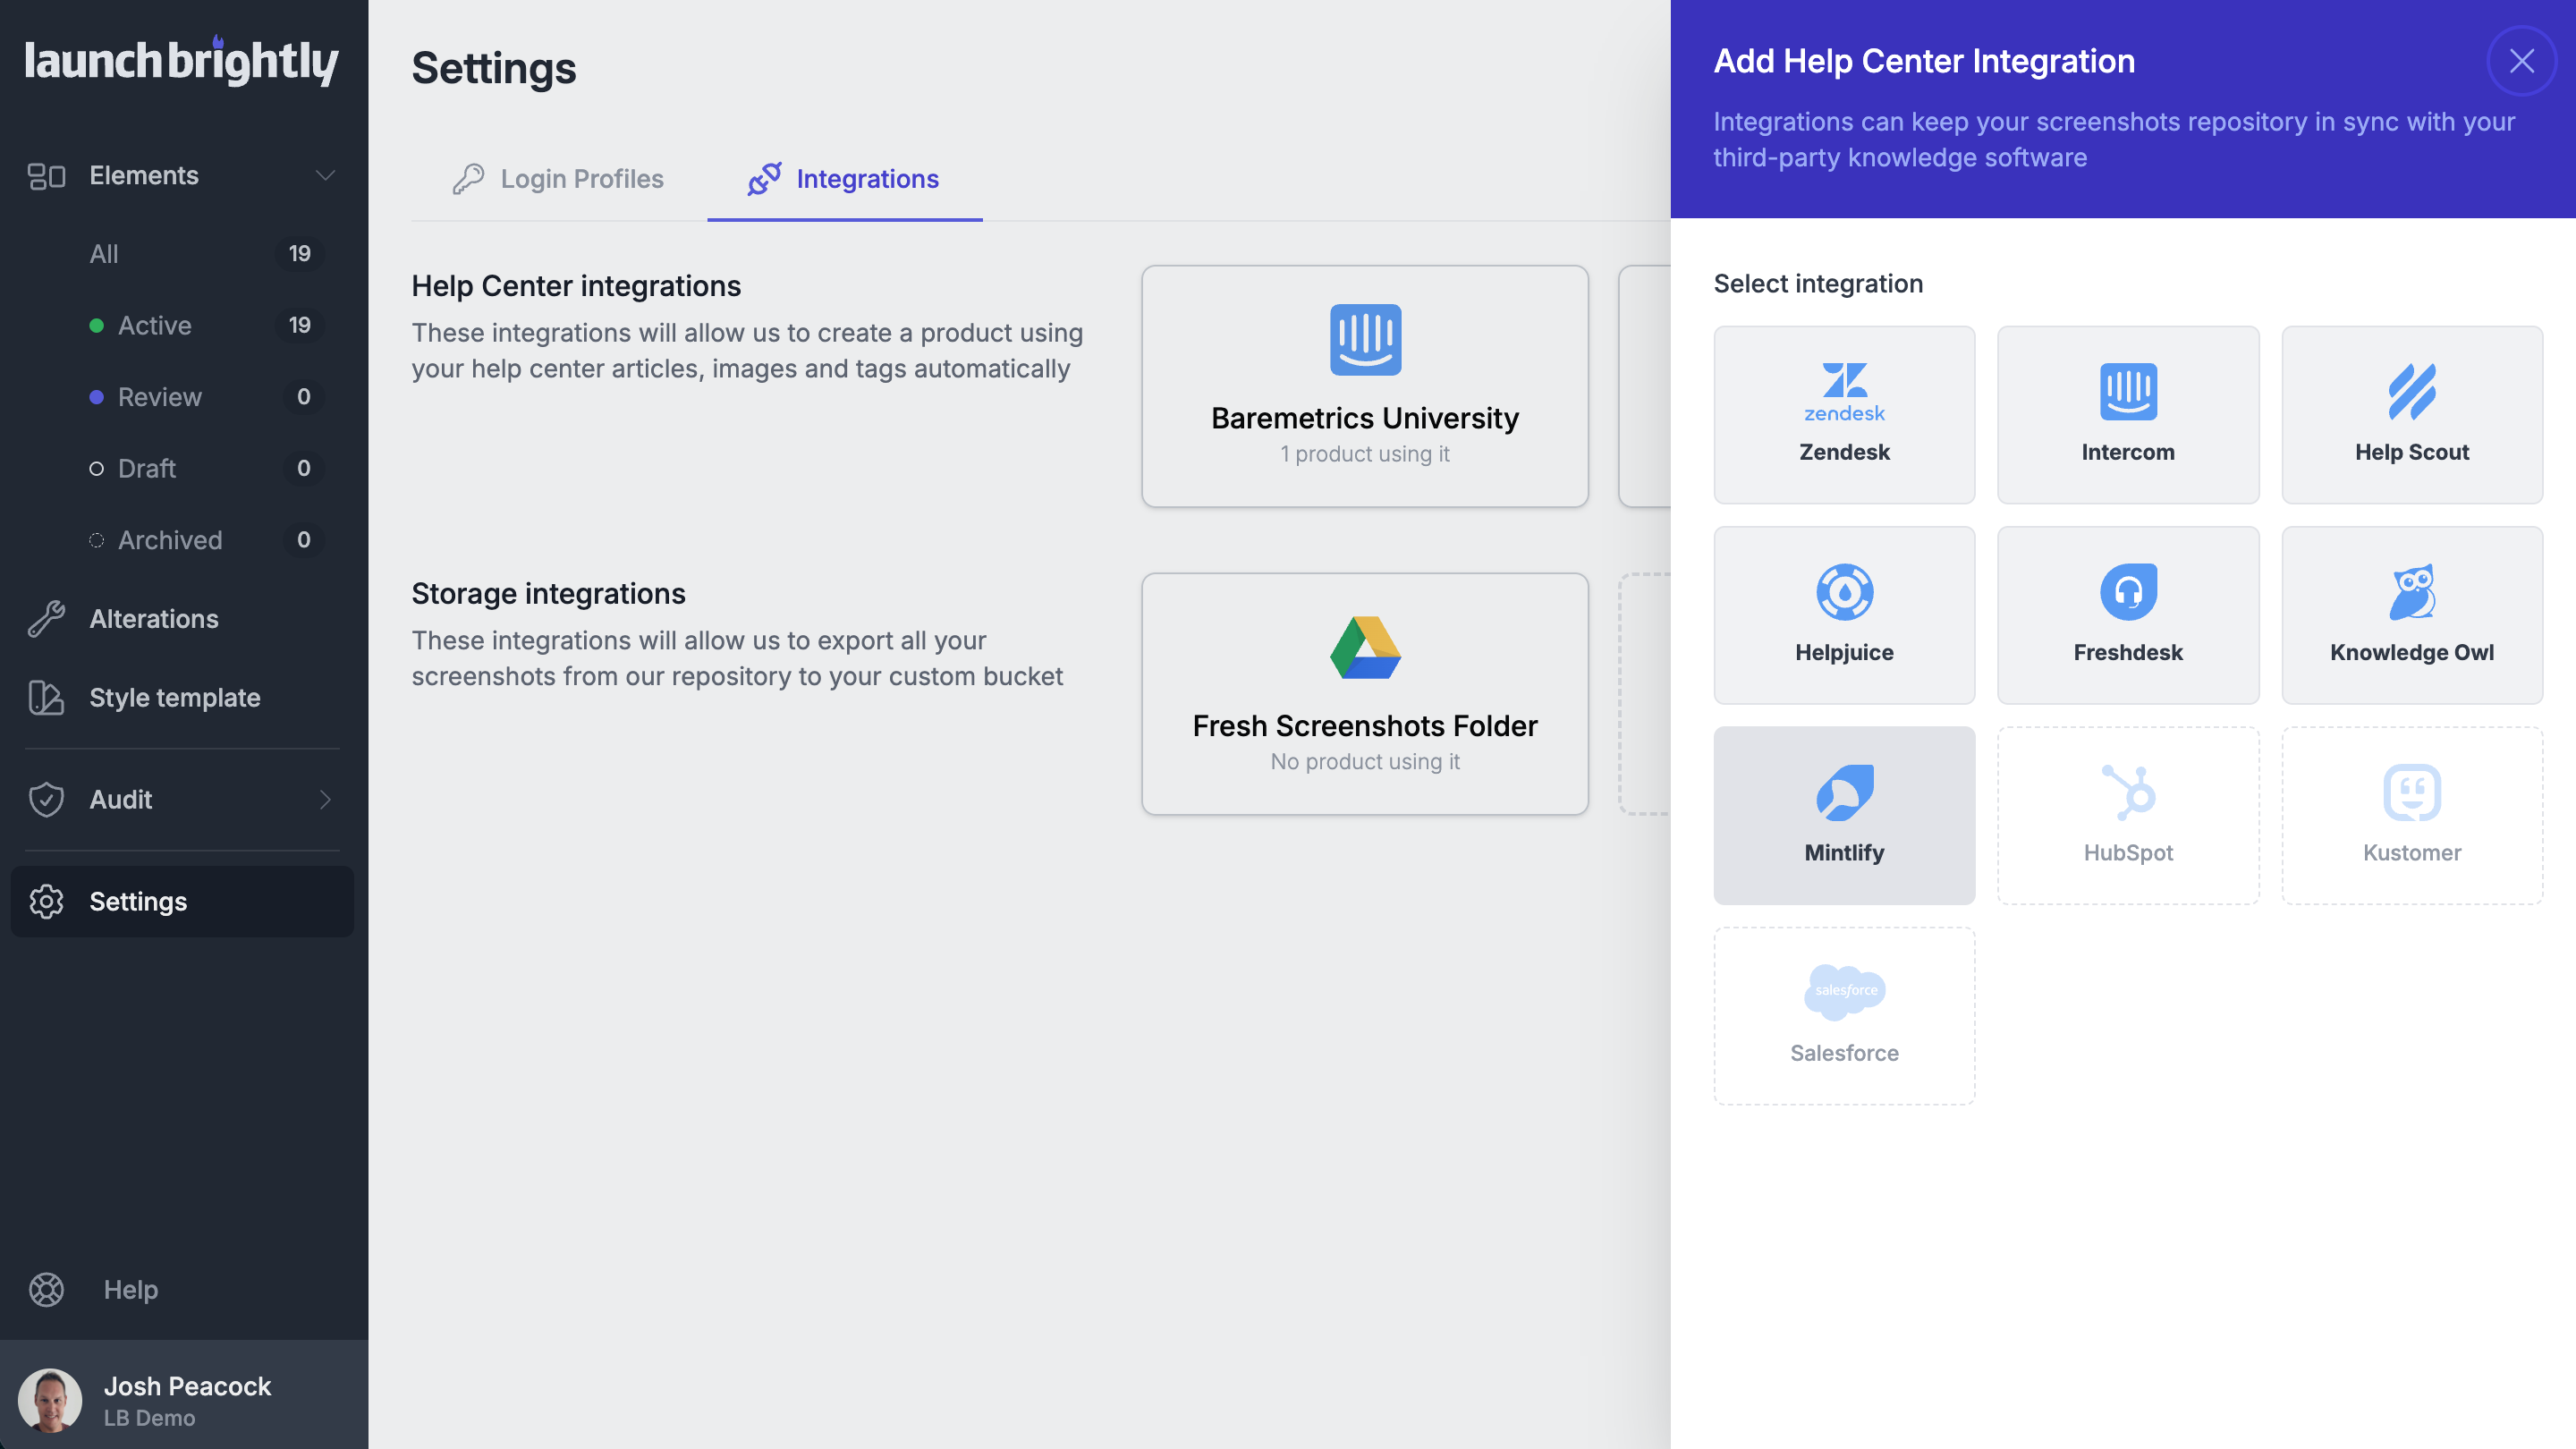
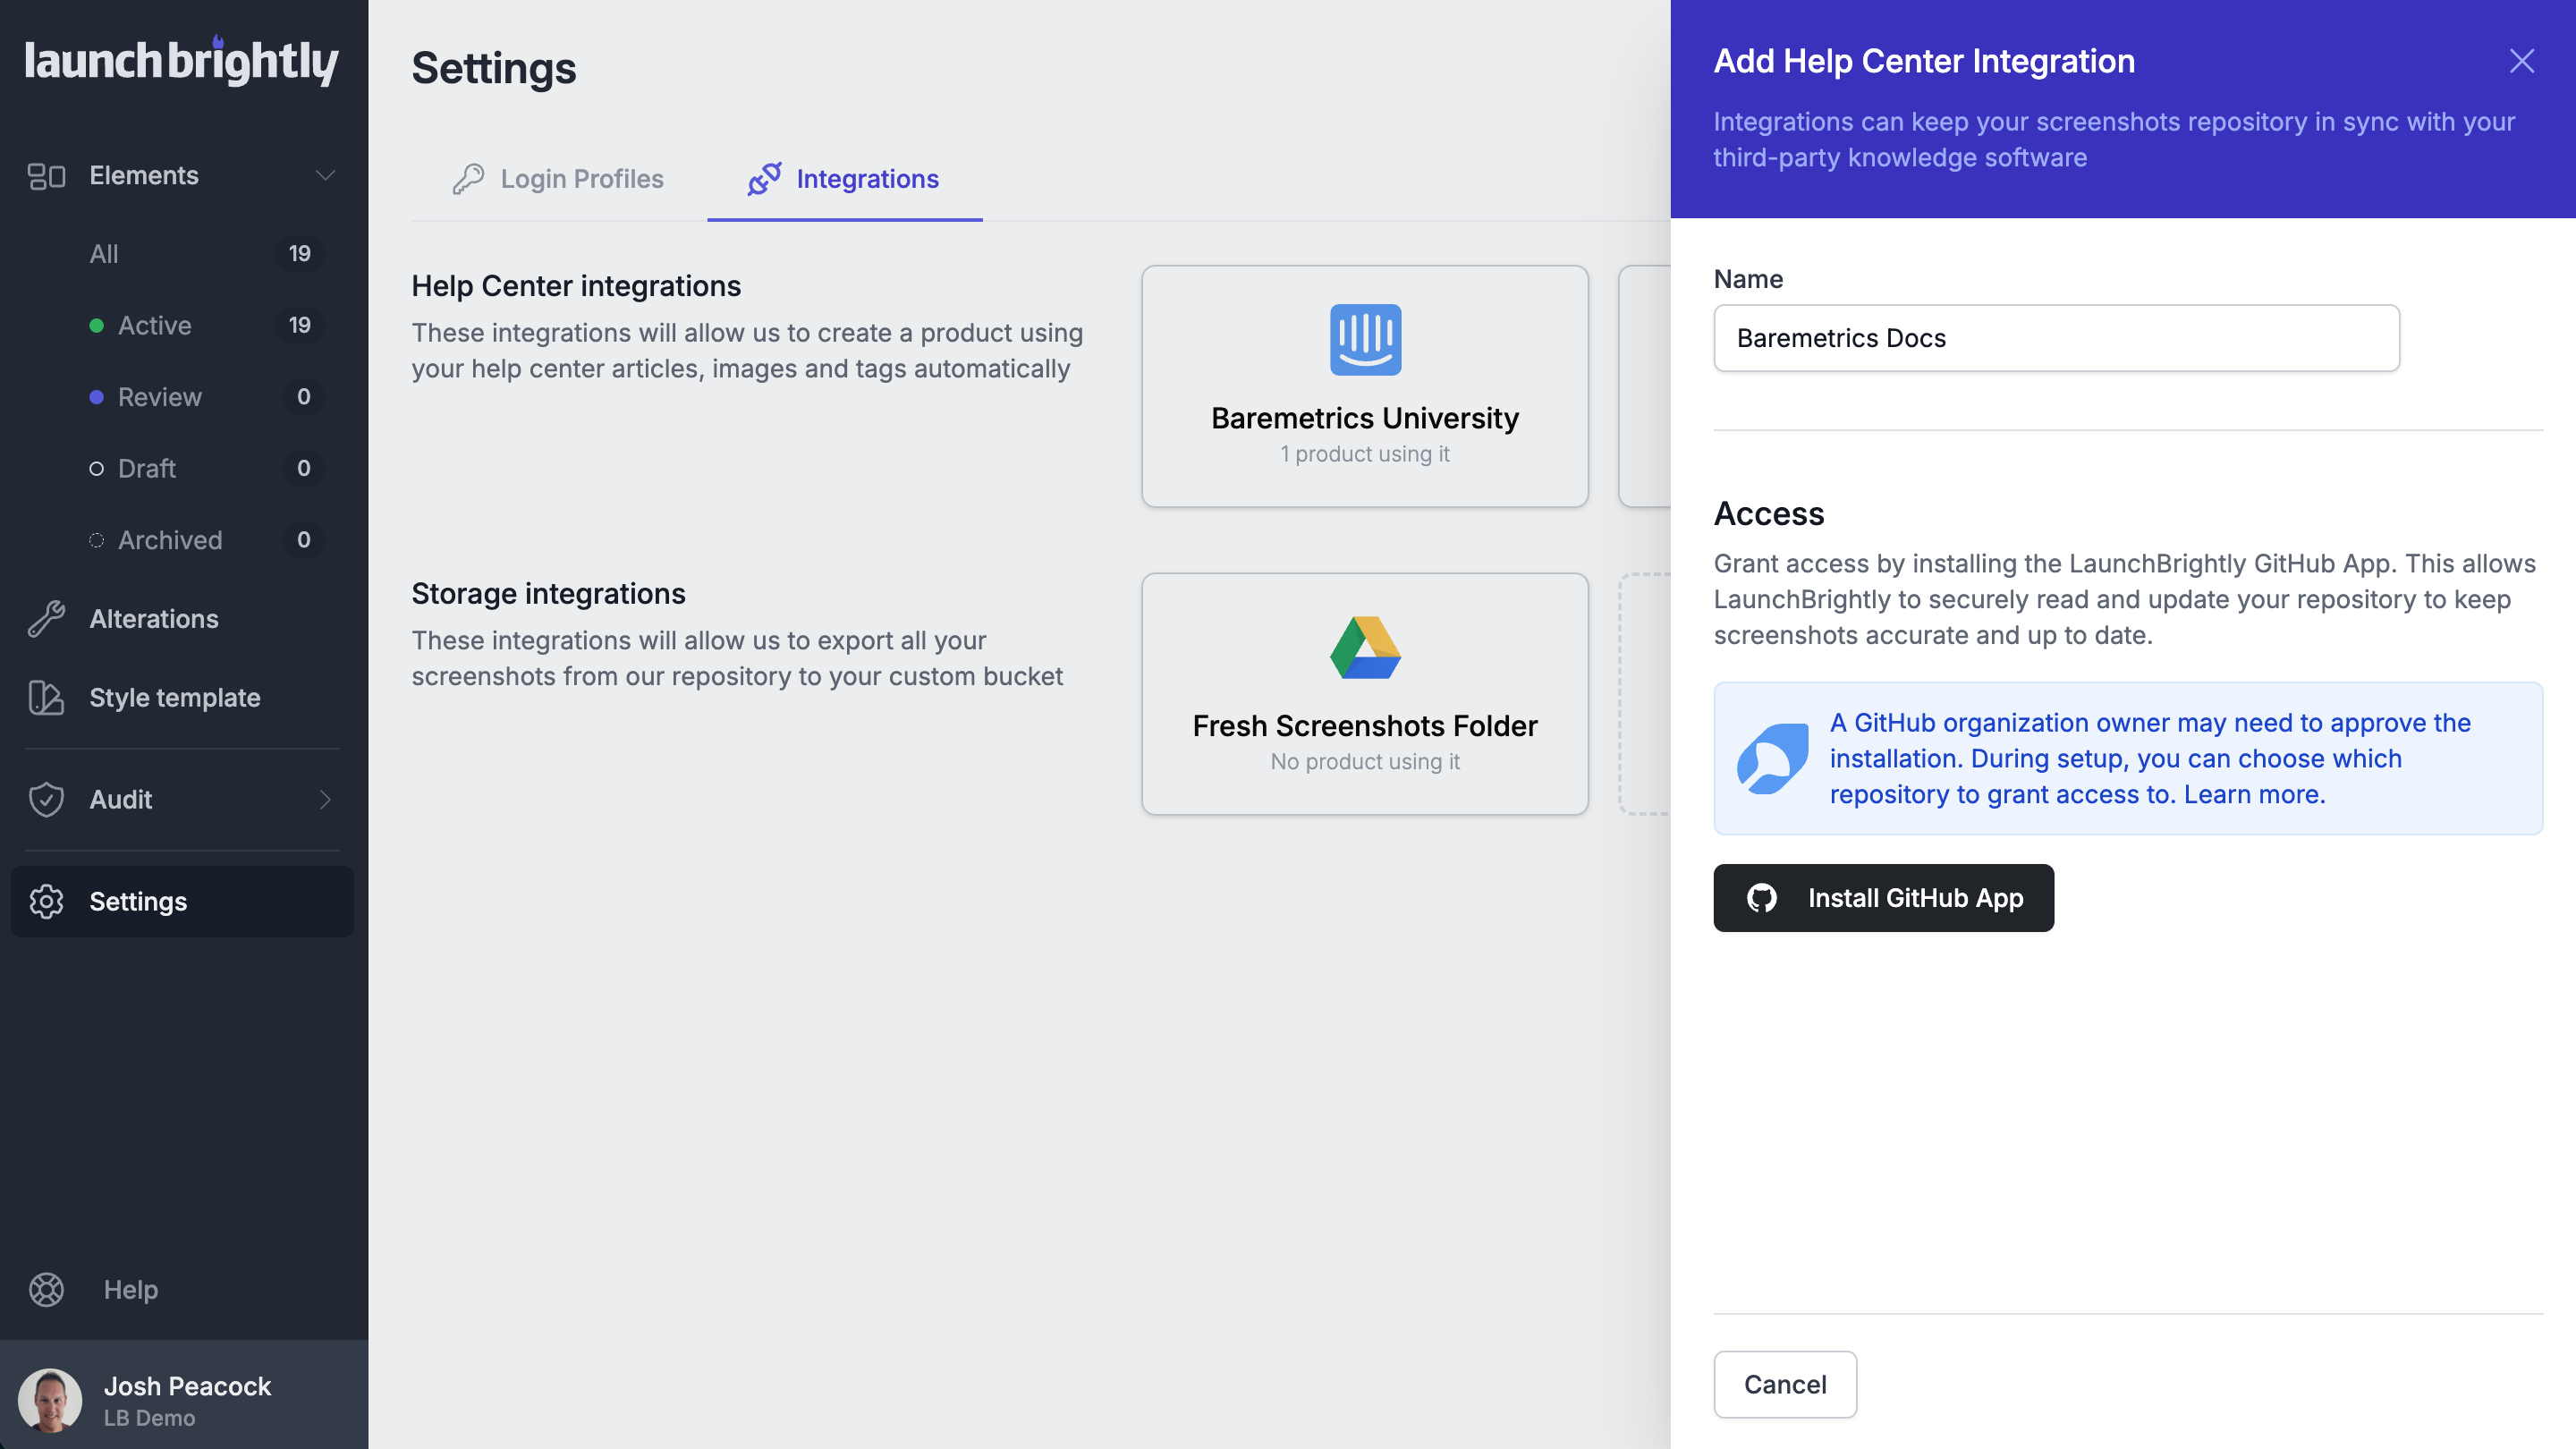
Add a Name for the integration
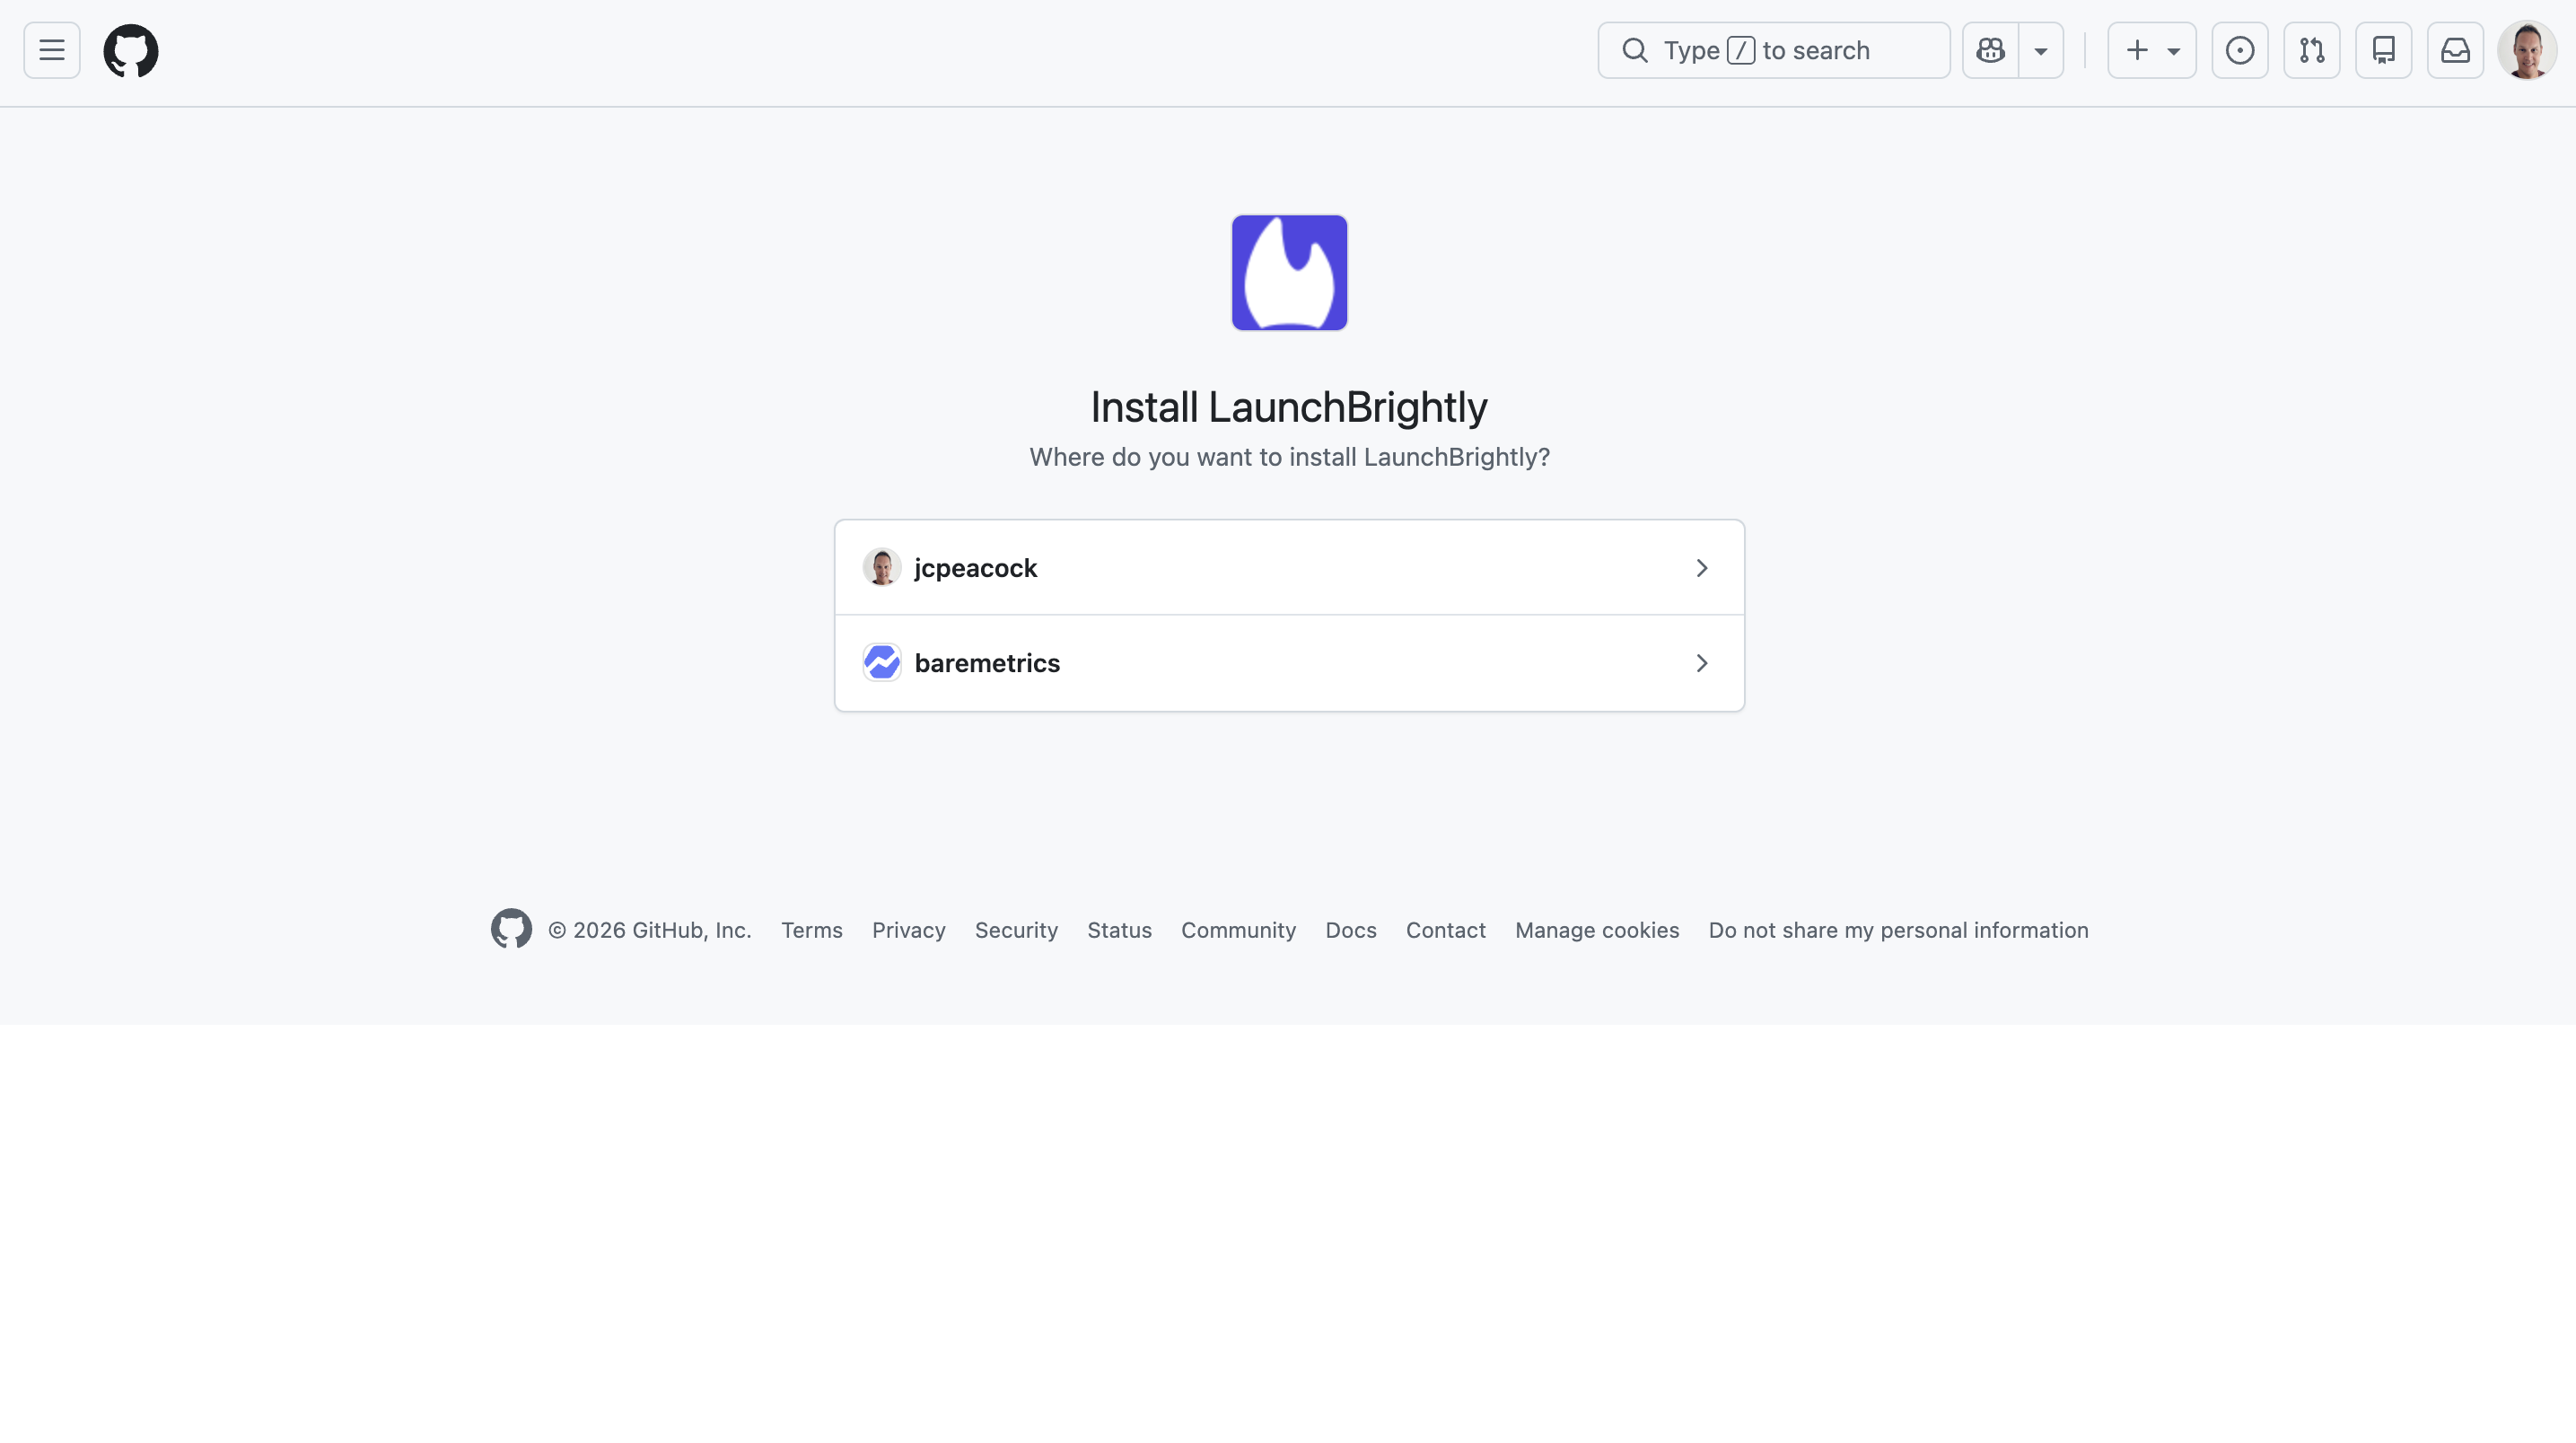
Under Access, select Install GitHub App. This will redirect you to GitHub, where you'll authorize LaunchBrightly to access your repository
On GitHub, select the organization or account where your Mintlify docs repository lives
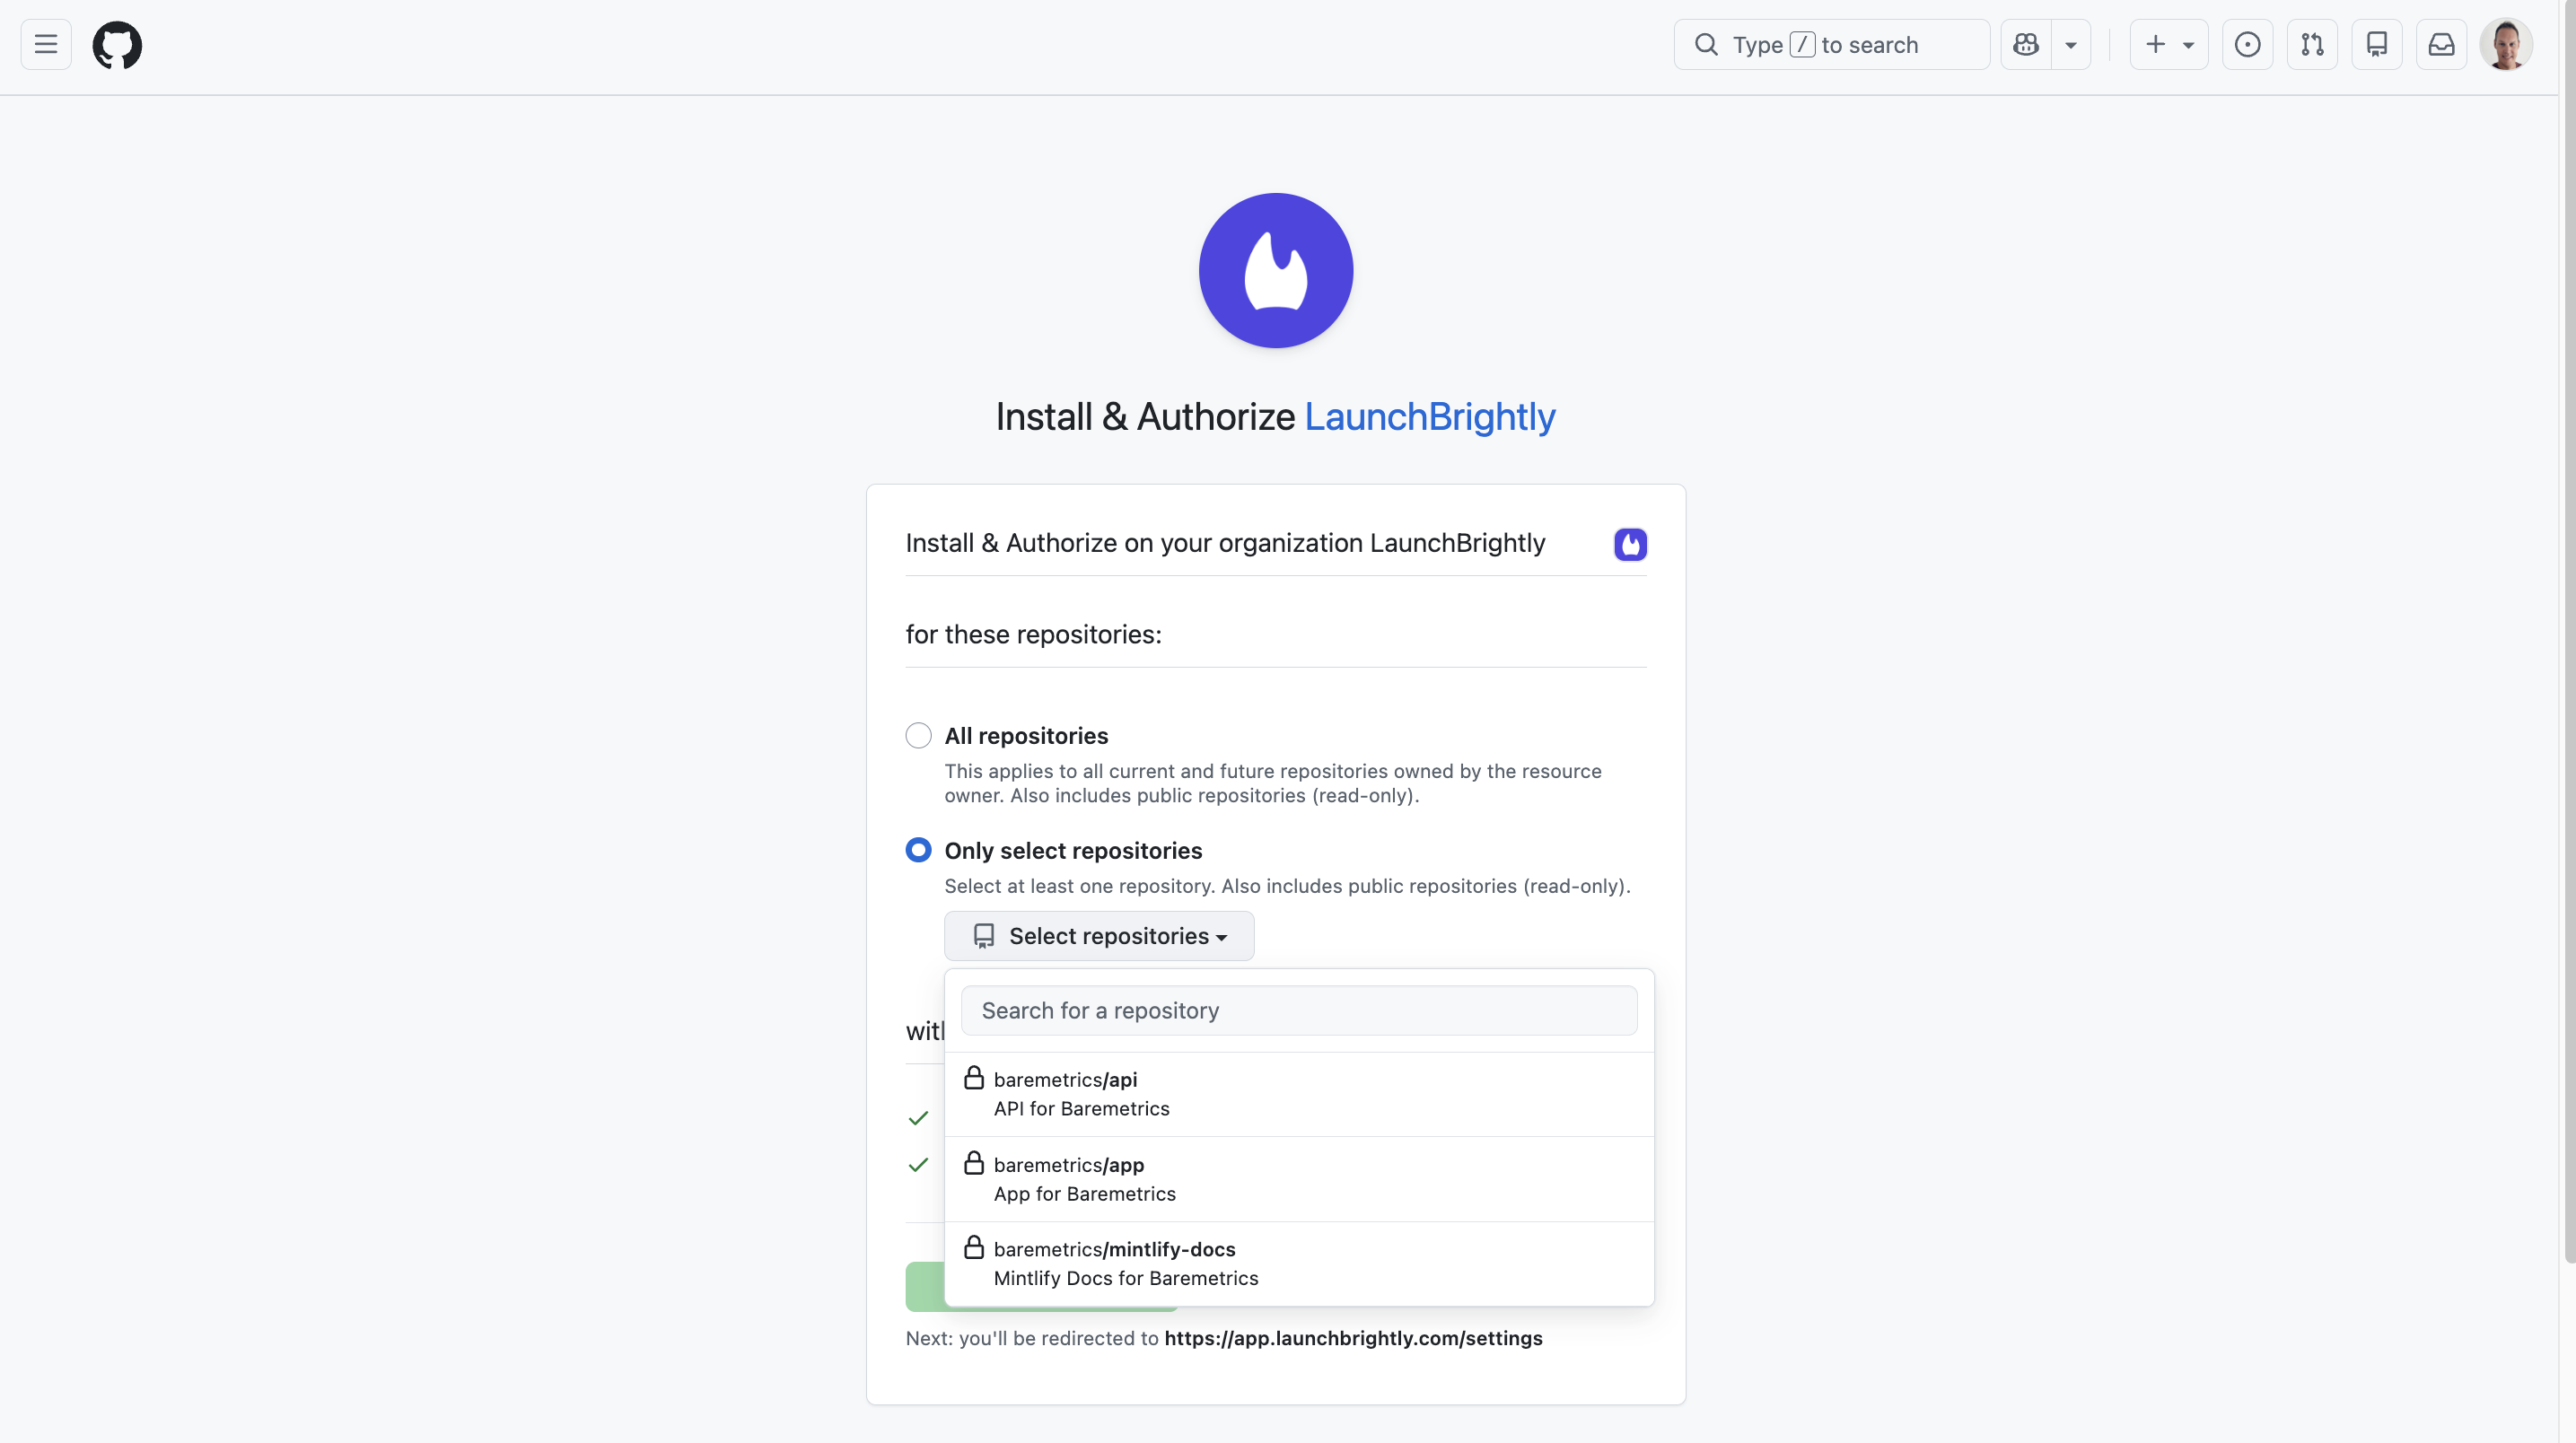
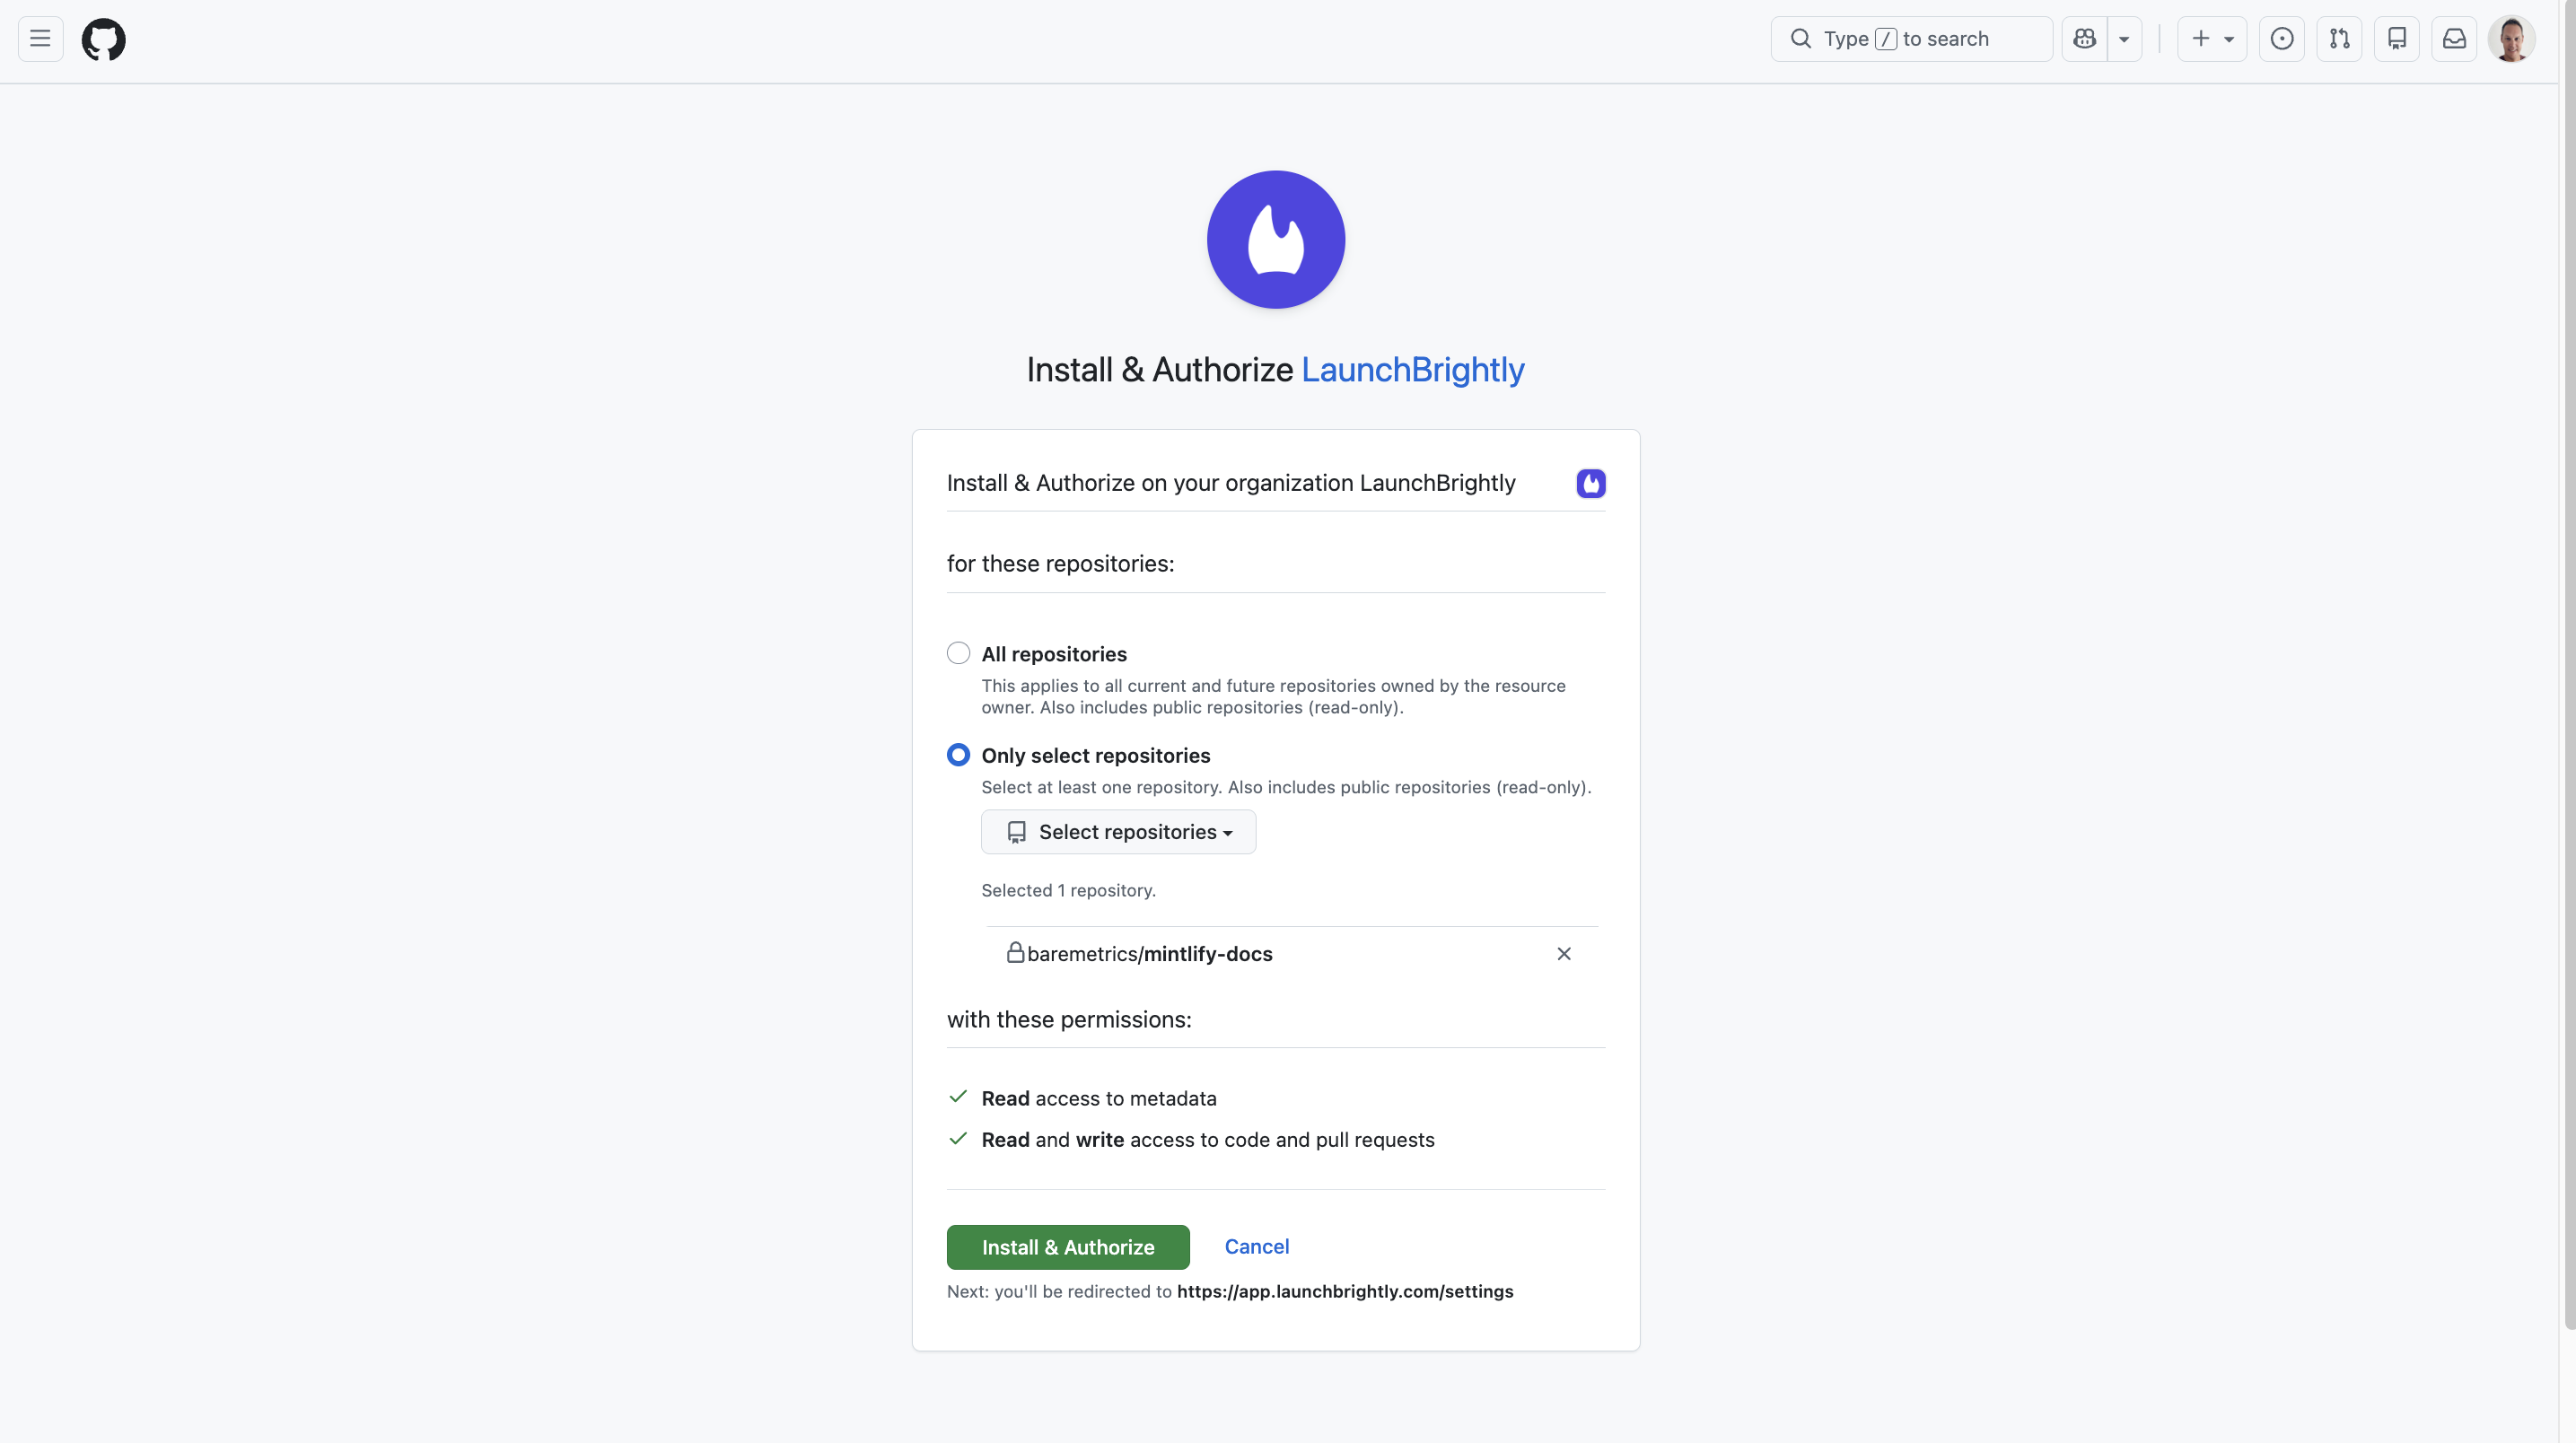
Choose Only select repositories, select the repository that contains your Mintlify documentation, and click Install & Authorize. You'll be redirected back to LaunchBrightly automatically.
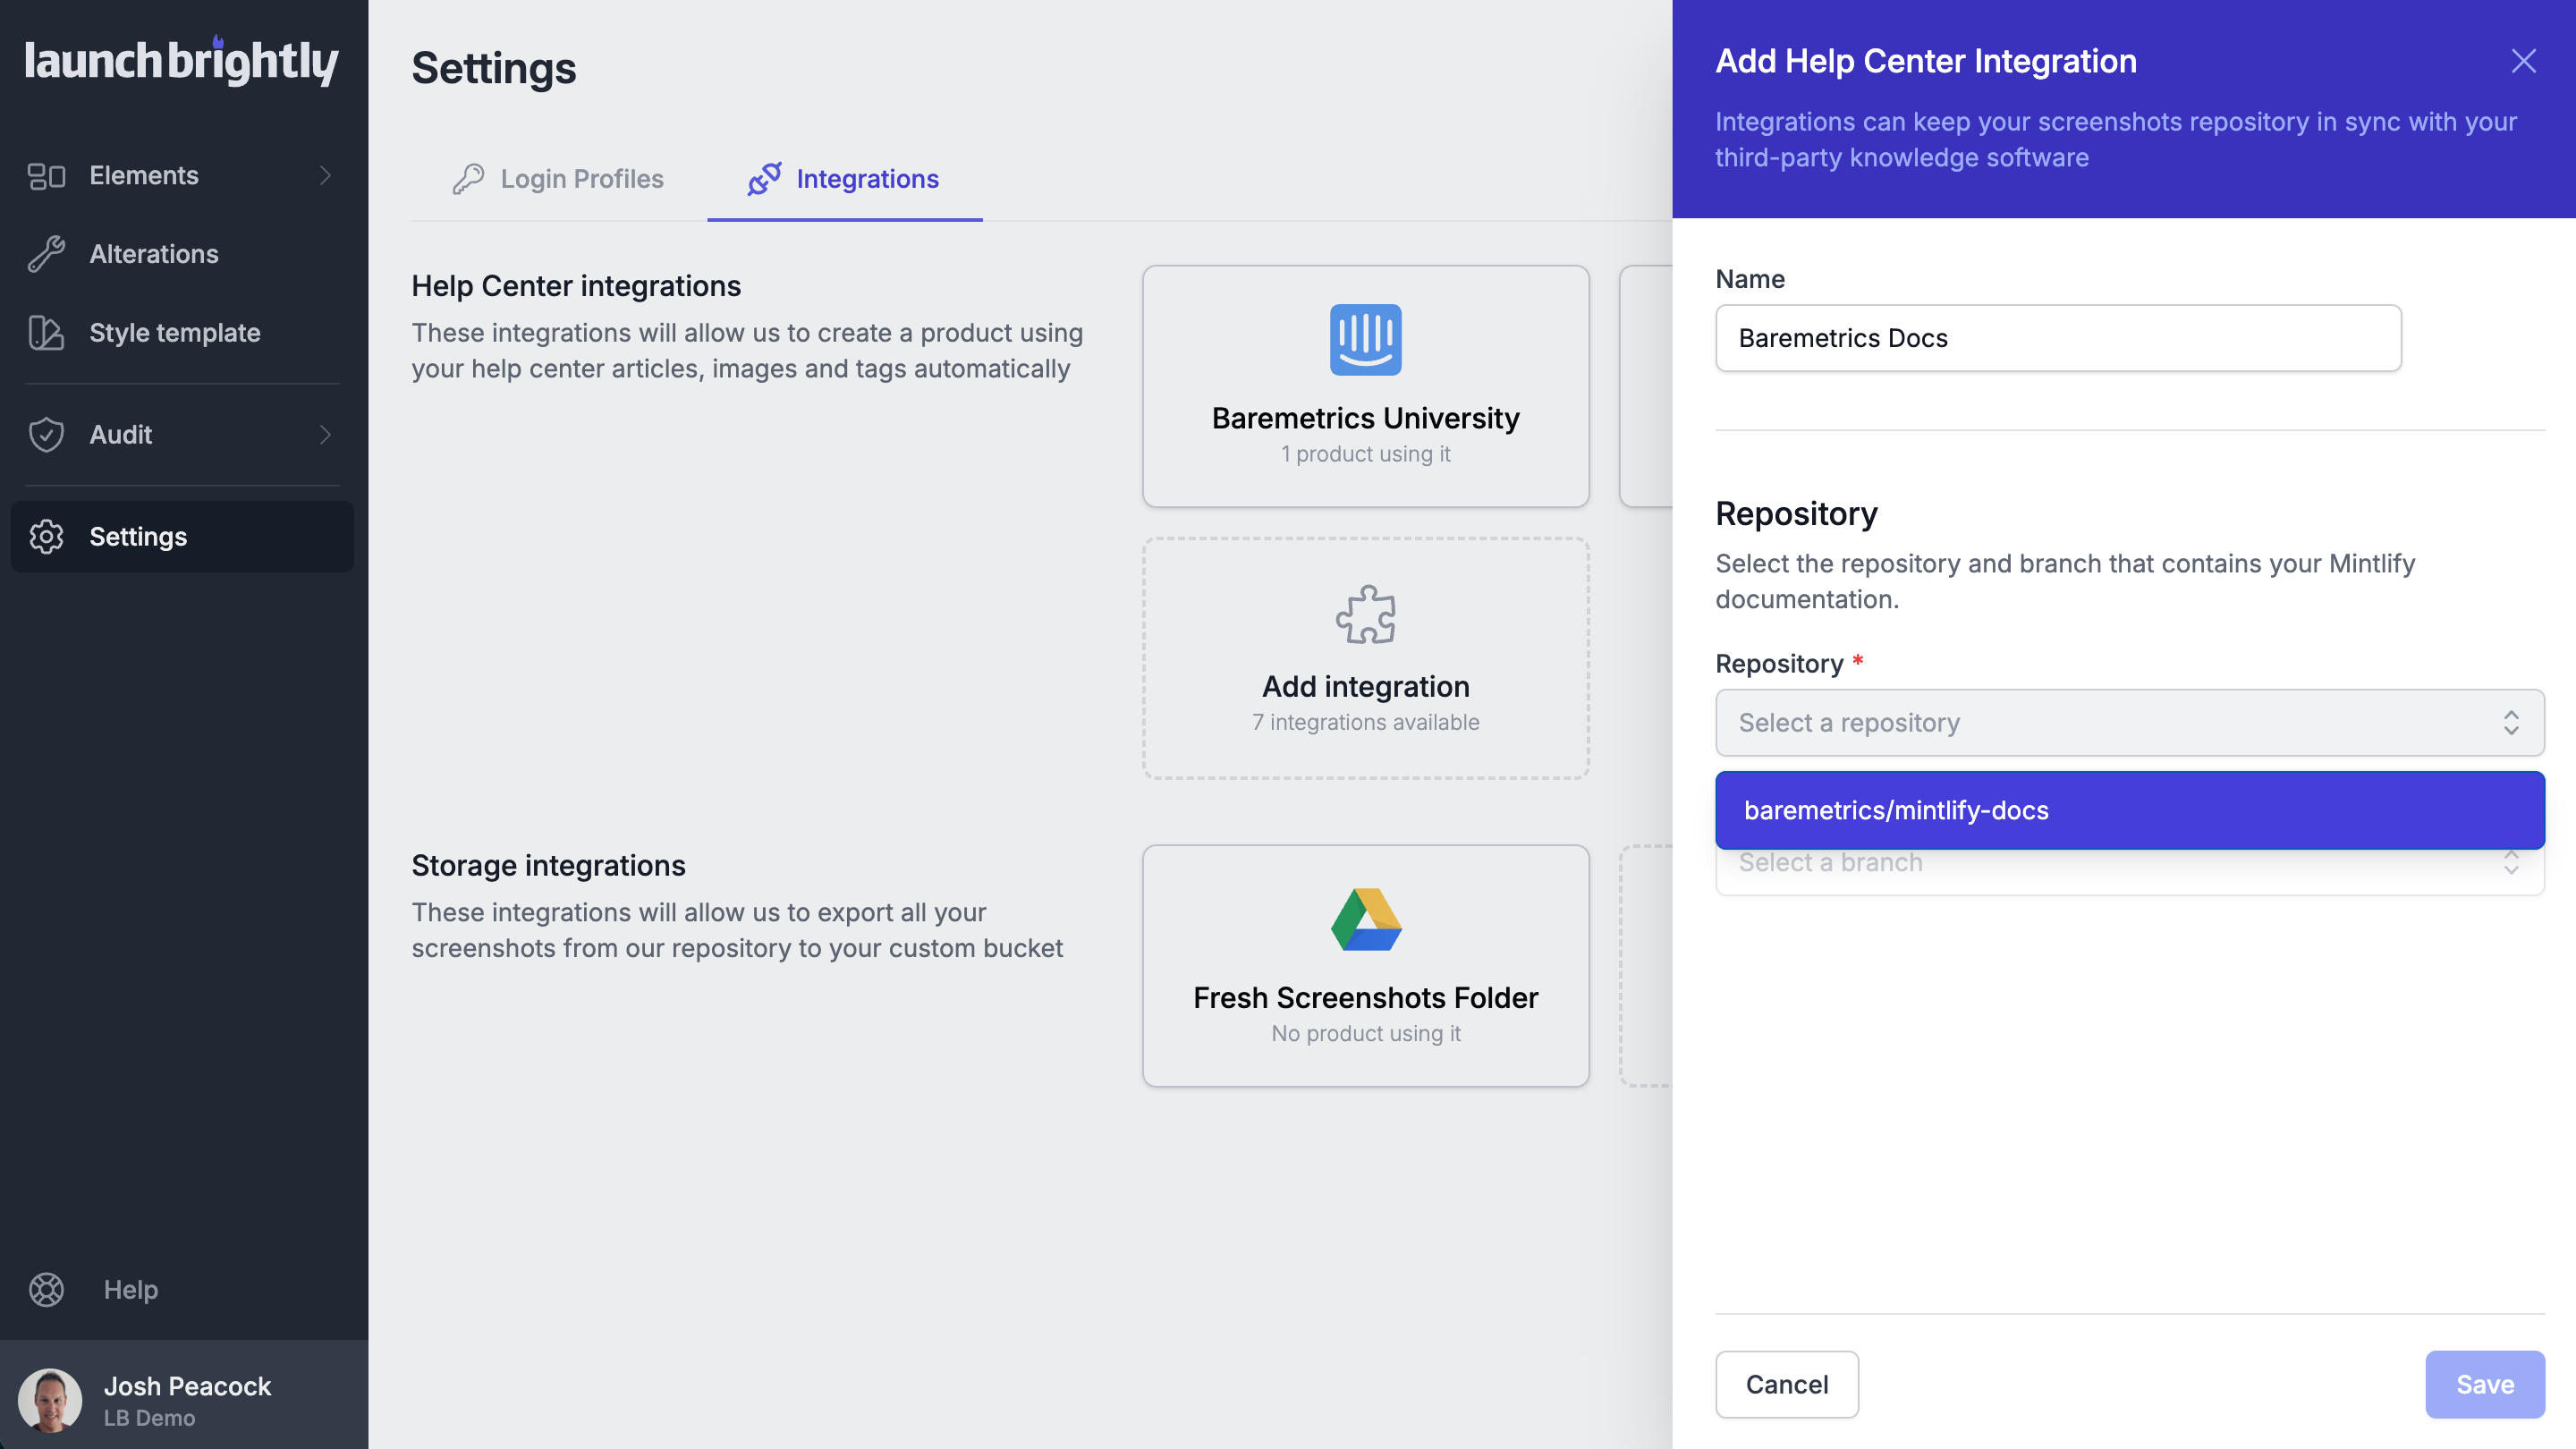
Back in LaunchBrightly, select the Repository and Branch that contain your Mintlify docs
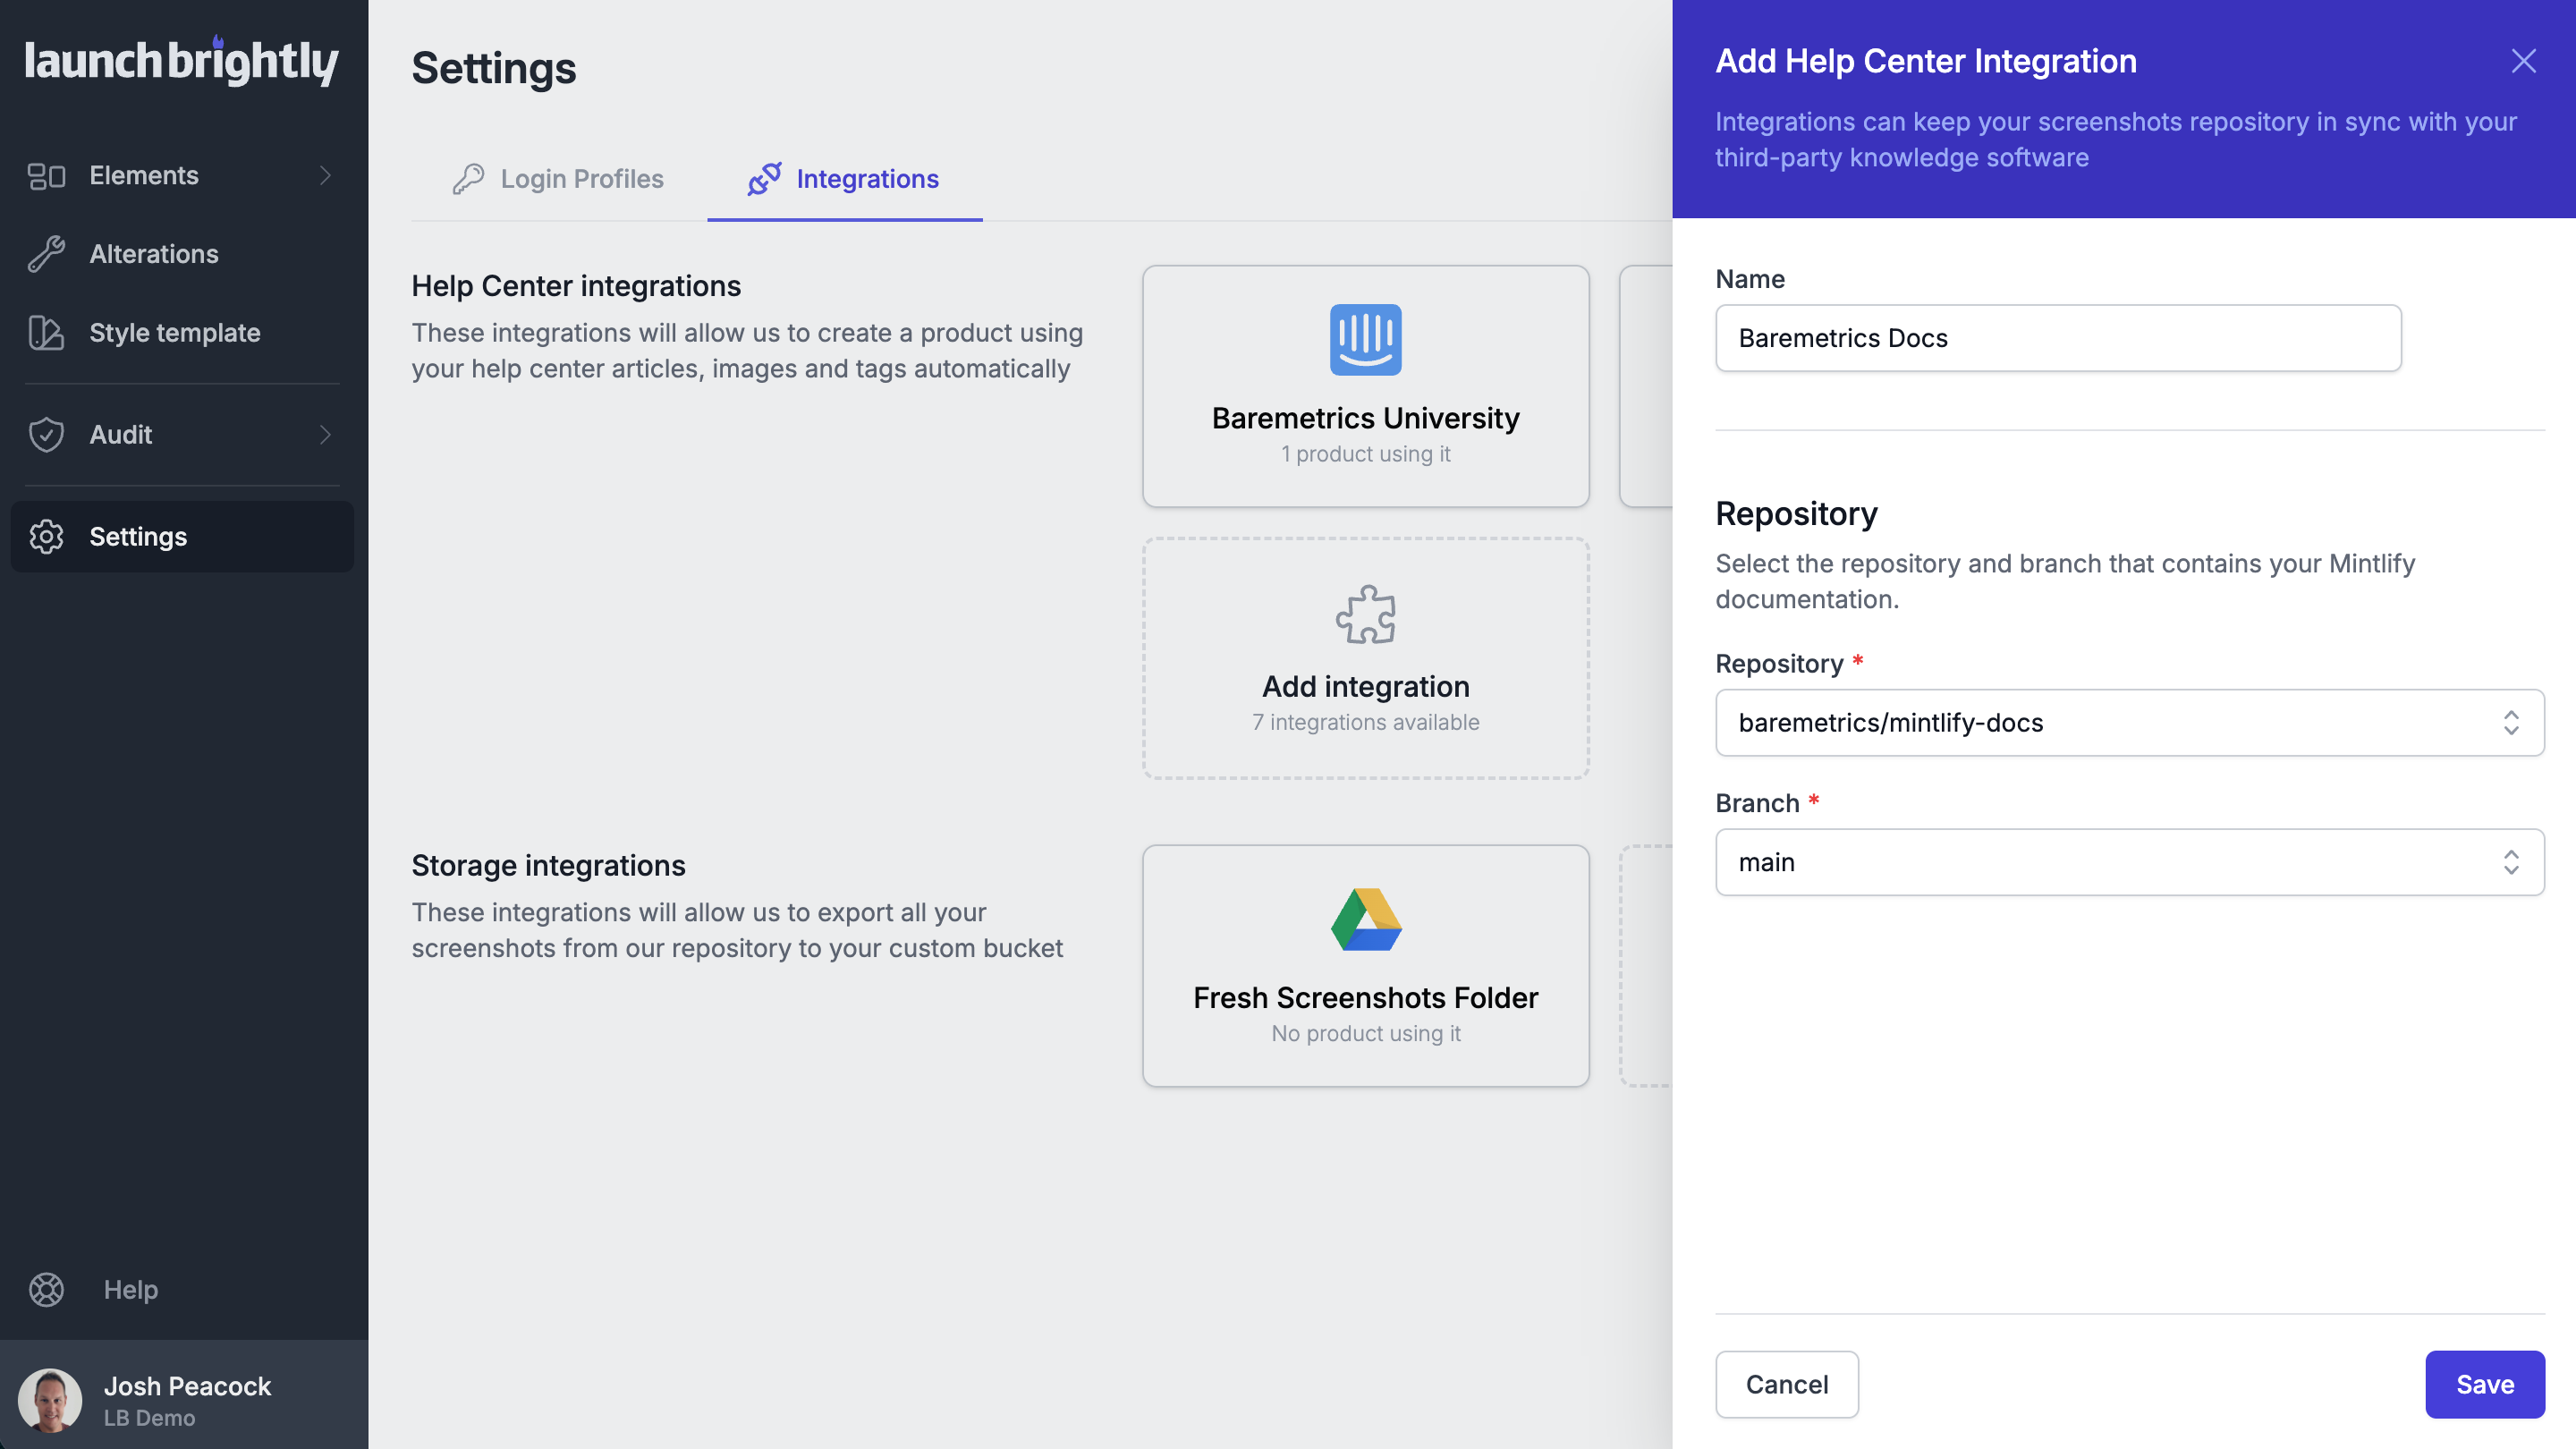
Click Save
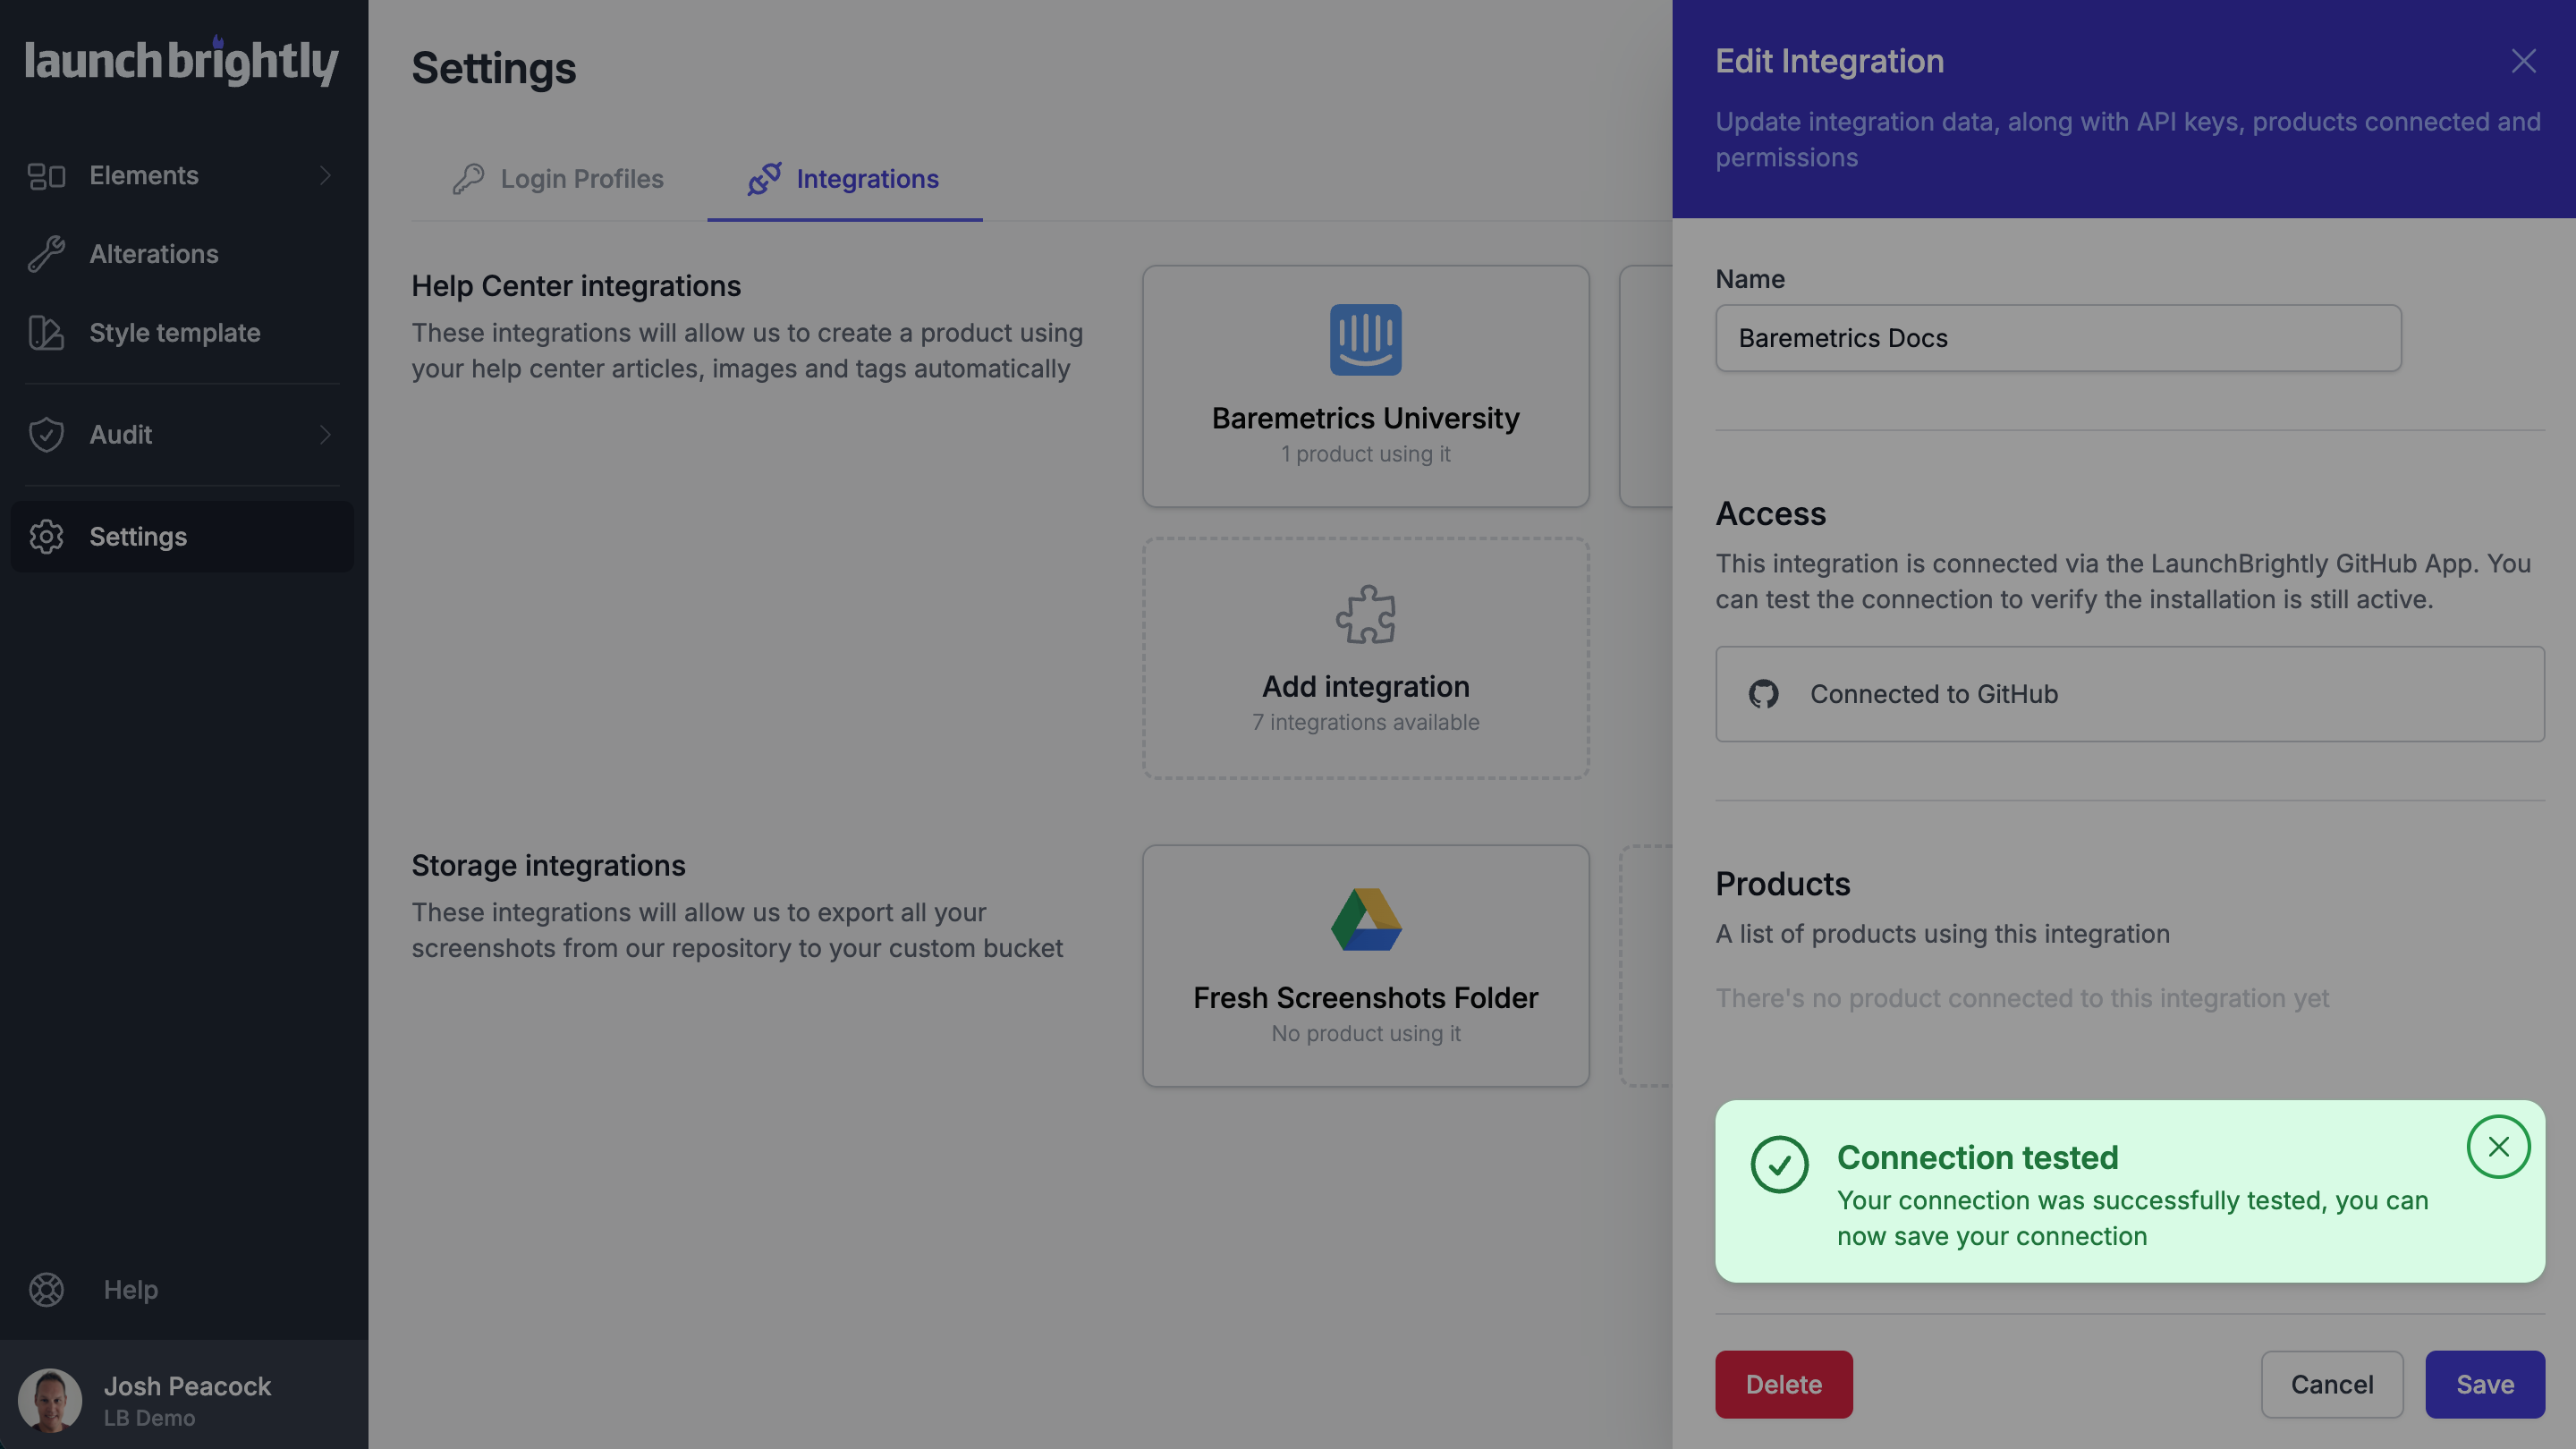
You'll see a confirmation message that your Mintlify integration was successfully saved and is ready to use. Finally, you can select open the saved integration and click Test connection to confirm your repo is successfully connected.
You're all set!
Note
All GitHub access is managed through the LaunchBrightly GitHub App, which requests only the minimum permissions needed — Read access to metadata and Read and write access to code and pull requests for the selected repository only.