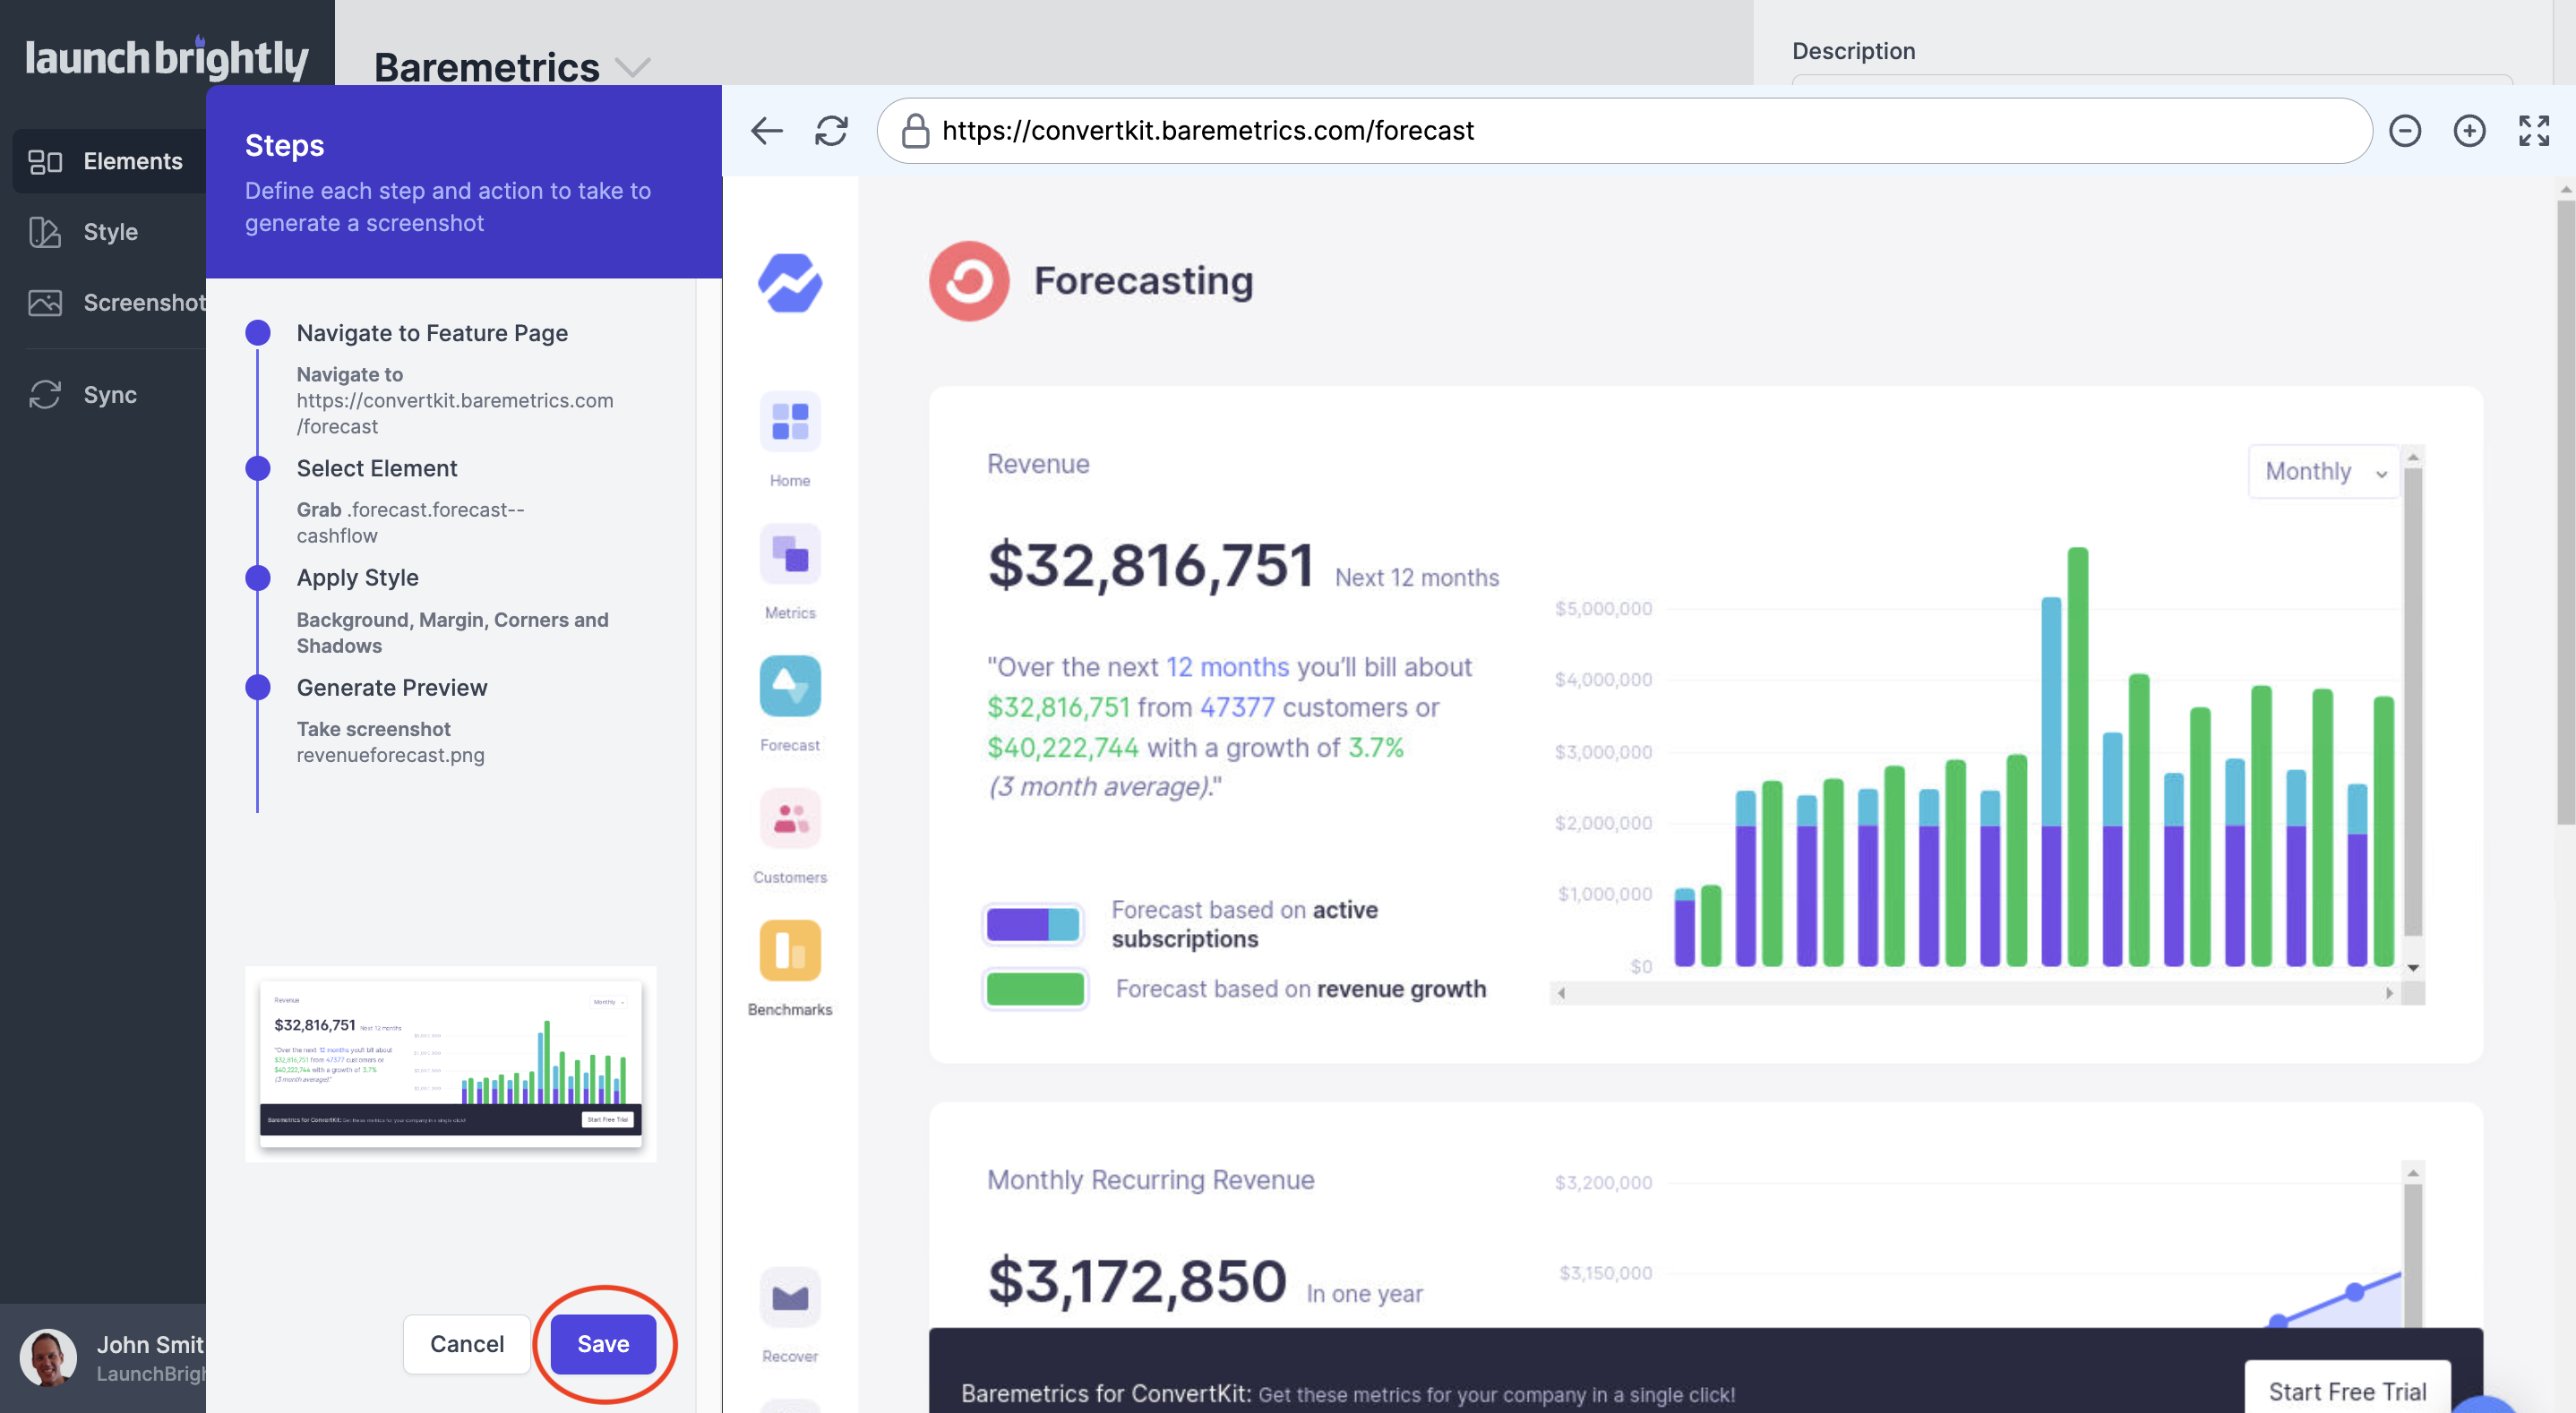
Use the Screenshot Setup Wizard to add a screenshot sequence
Click Add Screenshot Sequence to open the point-and-click Screenshot Setup Wizard and a Cloud Browser of your web application within the LaunchBrightly console.
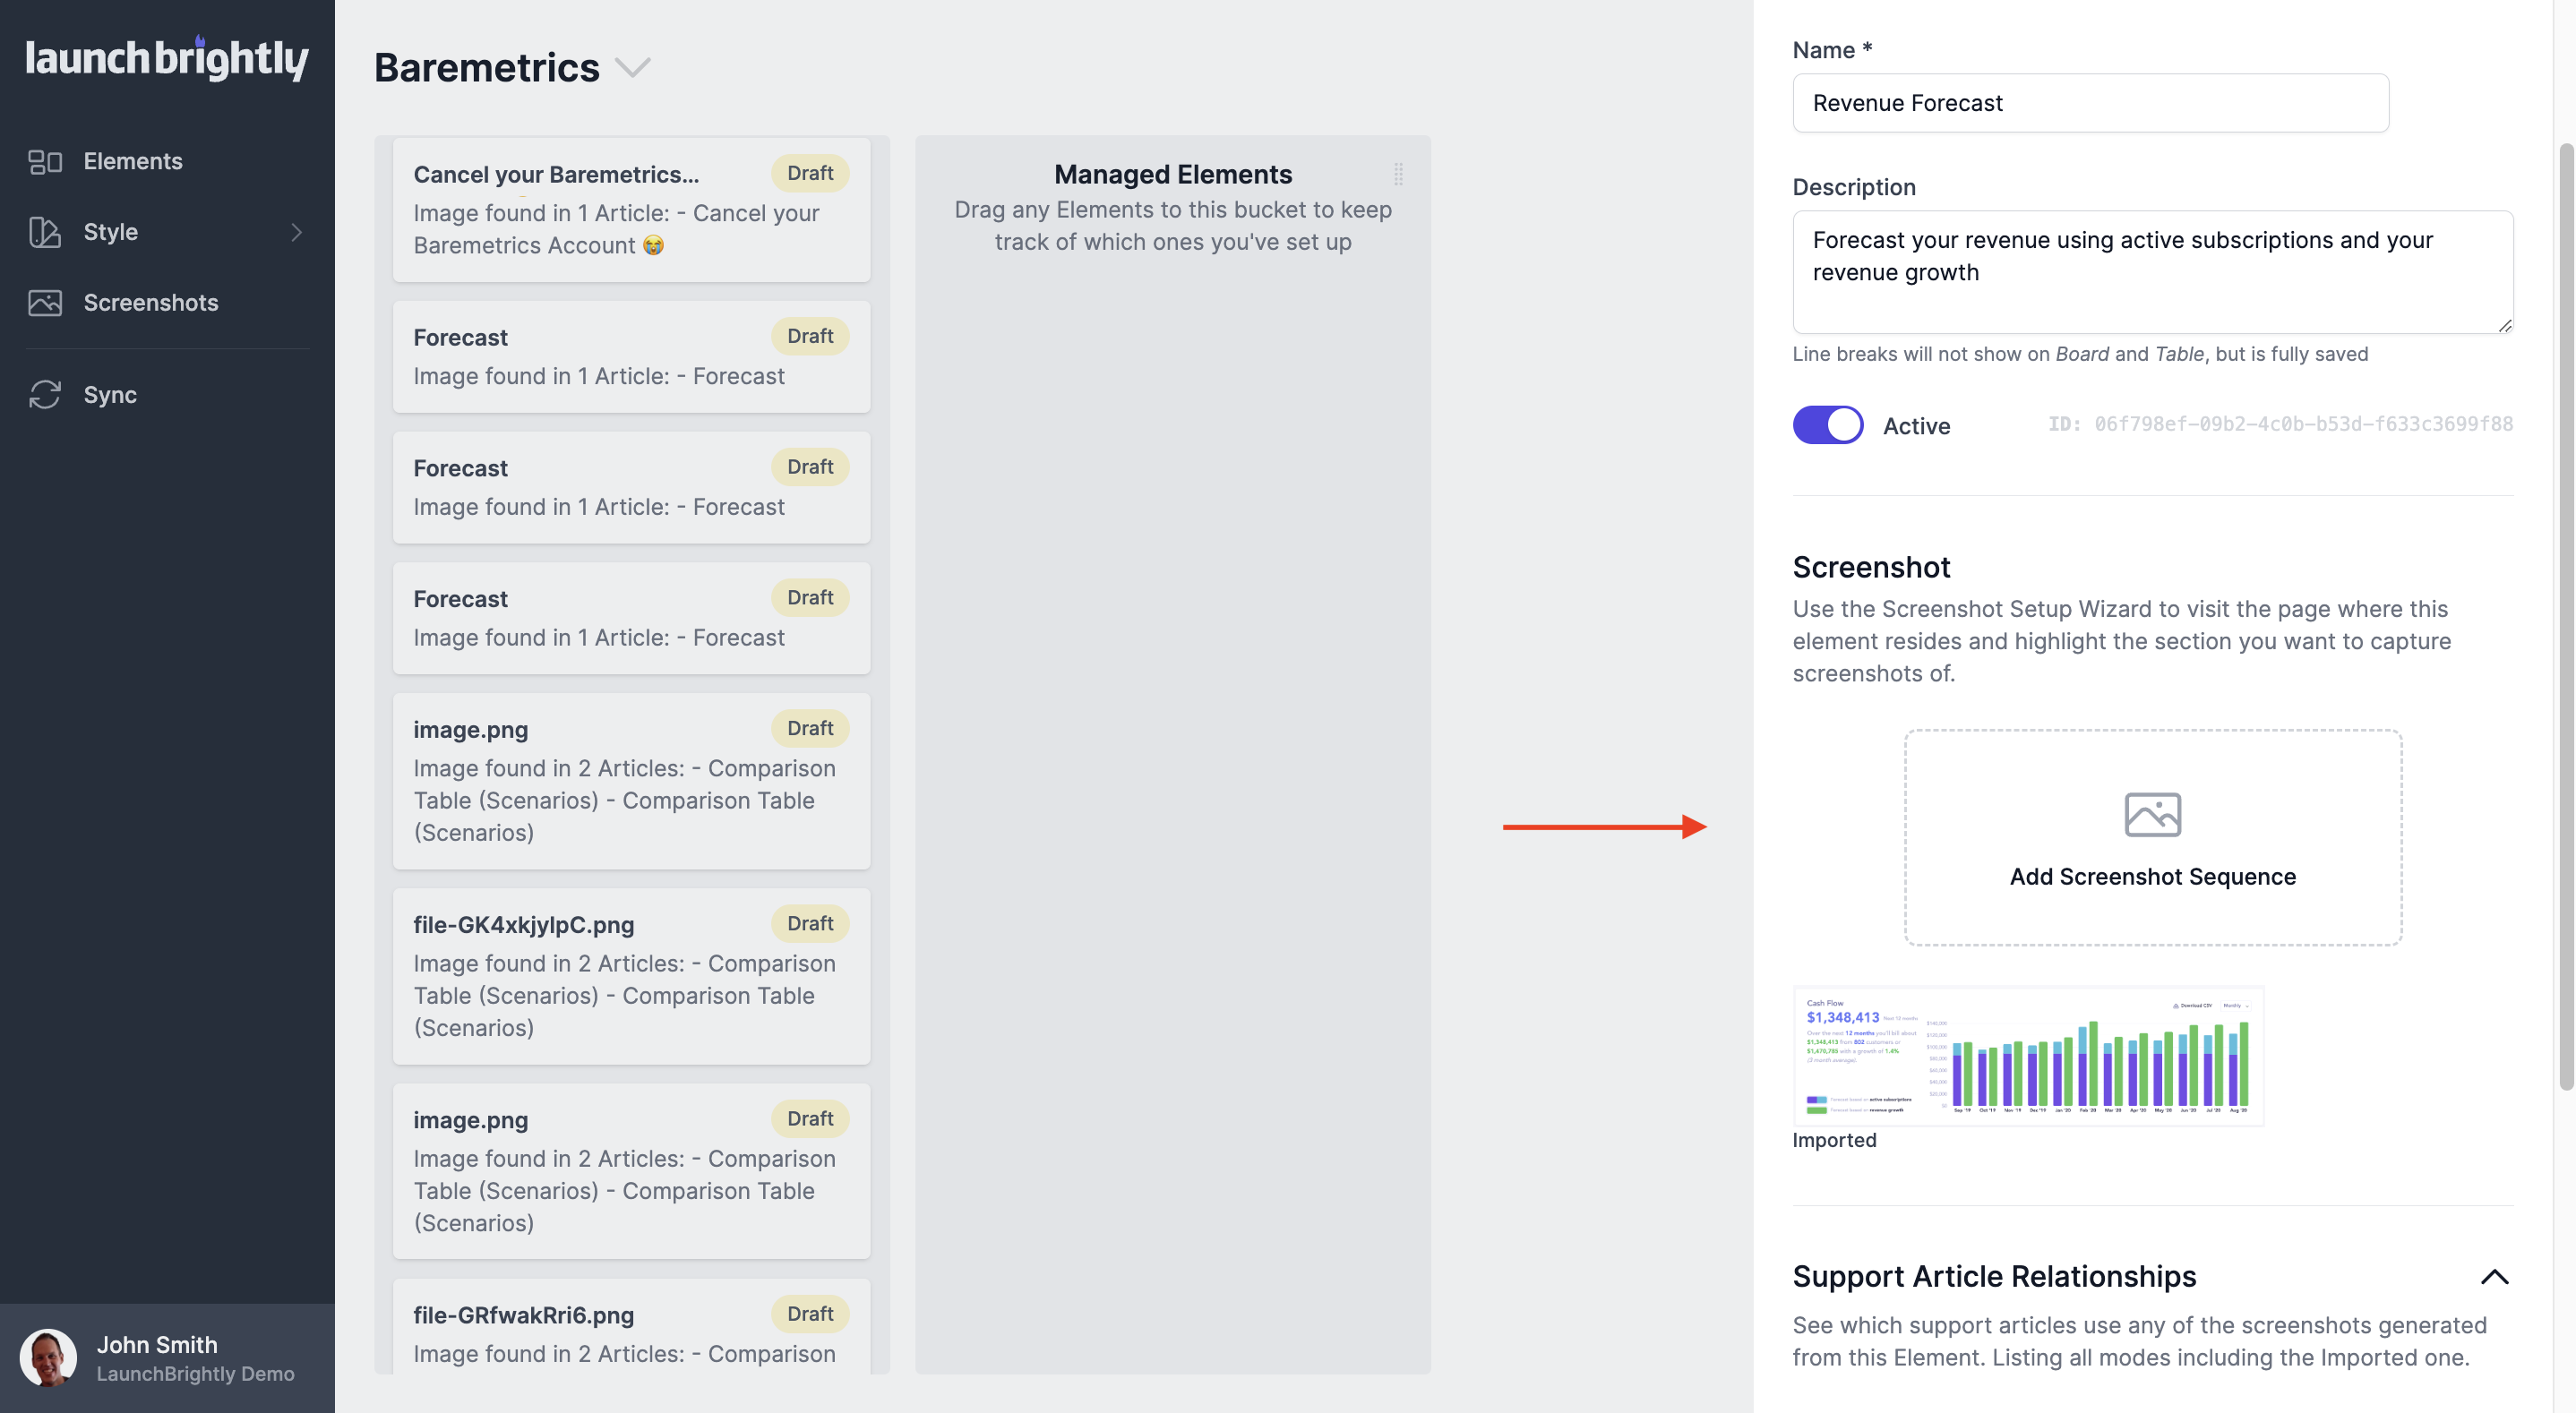
The platform will automatically log into your web application within the Cloud Browser in your LaunchBrightly console. You will be able to navigate to the page on your web application where the Product Element lives by entering the URL in the Cloud Browser bar or clicking through the page links to navigate to the relevant page.
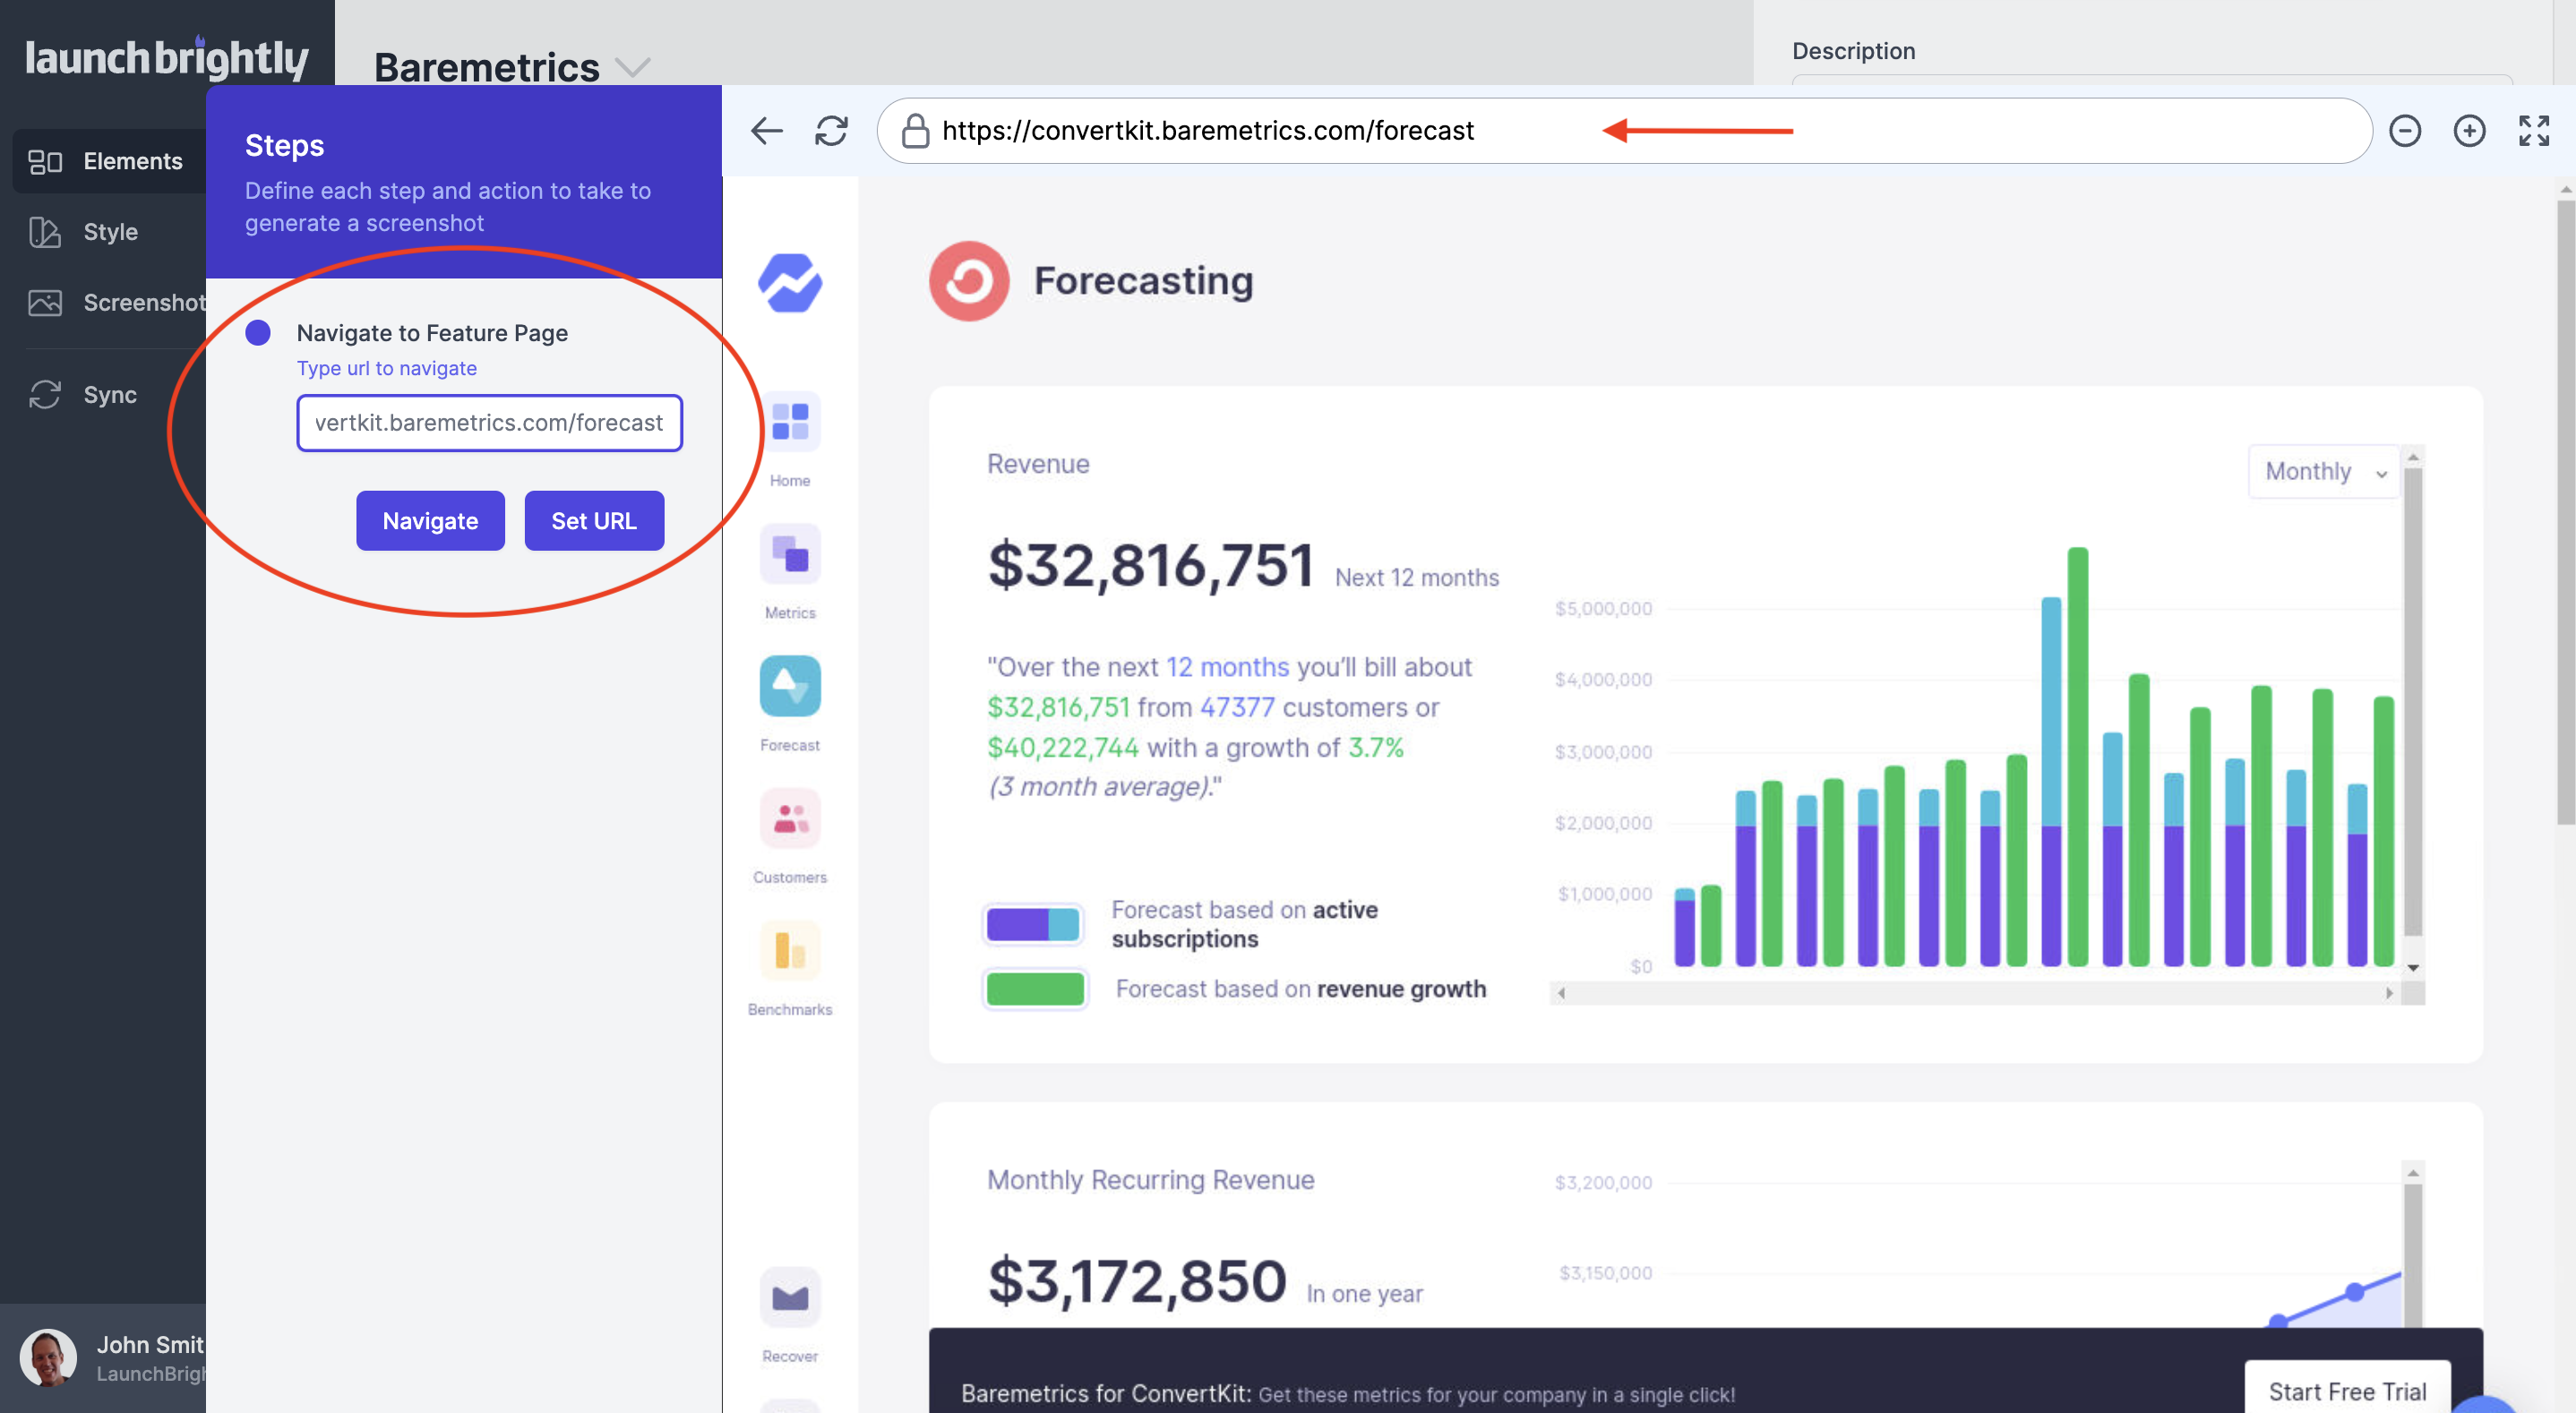
Once you have navigated to the page where the Product Element you want to capture lives, select Set URL.
From within the Cloud Browser use the point-and-click Screenshot Setup Wizard to hover your mouse over the page and highlight the Product Element you want to capture screenshots of. The Screenshot Setup Wizard will automatically adjust the Product Element it highlights as you move your mouse across the page.
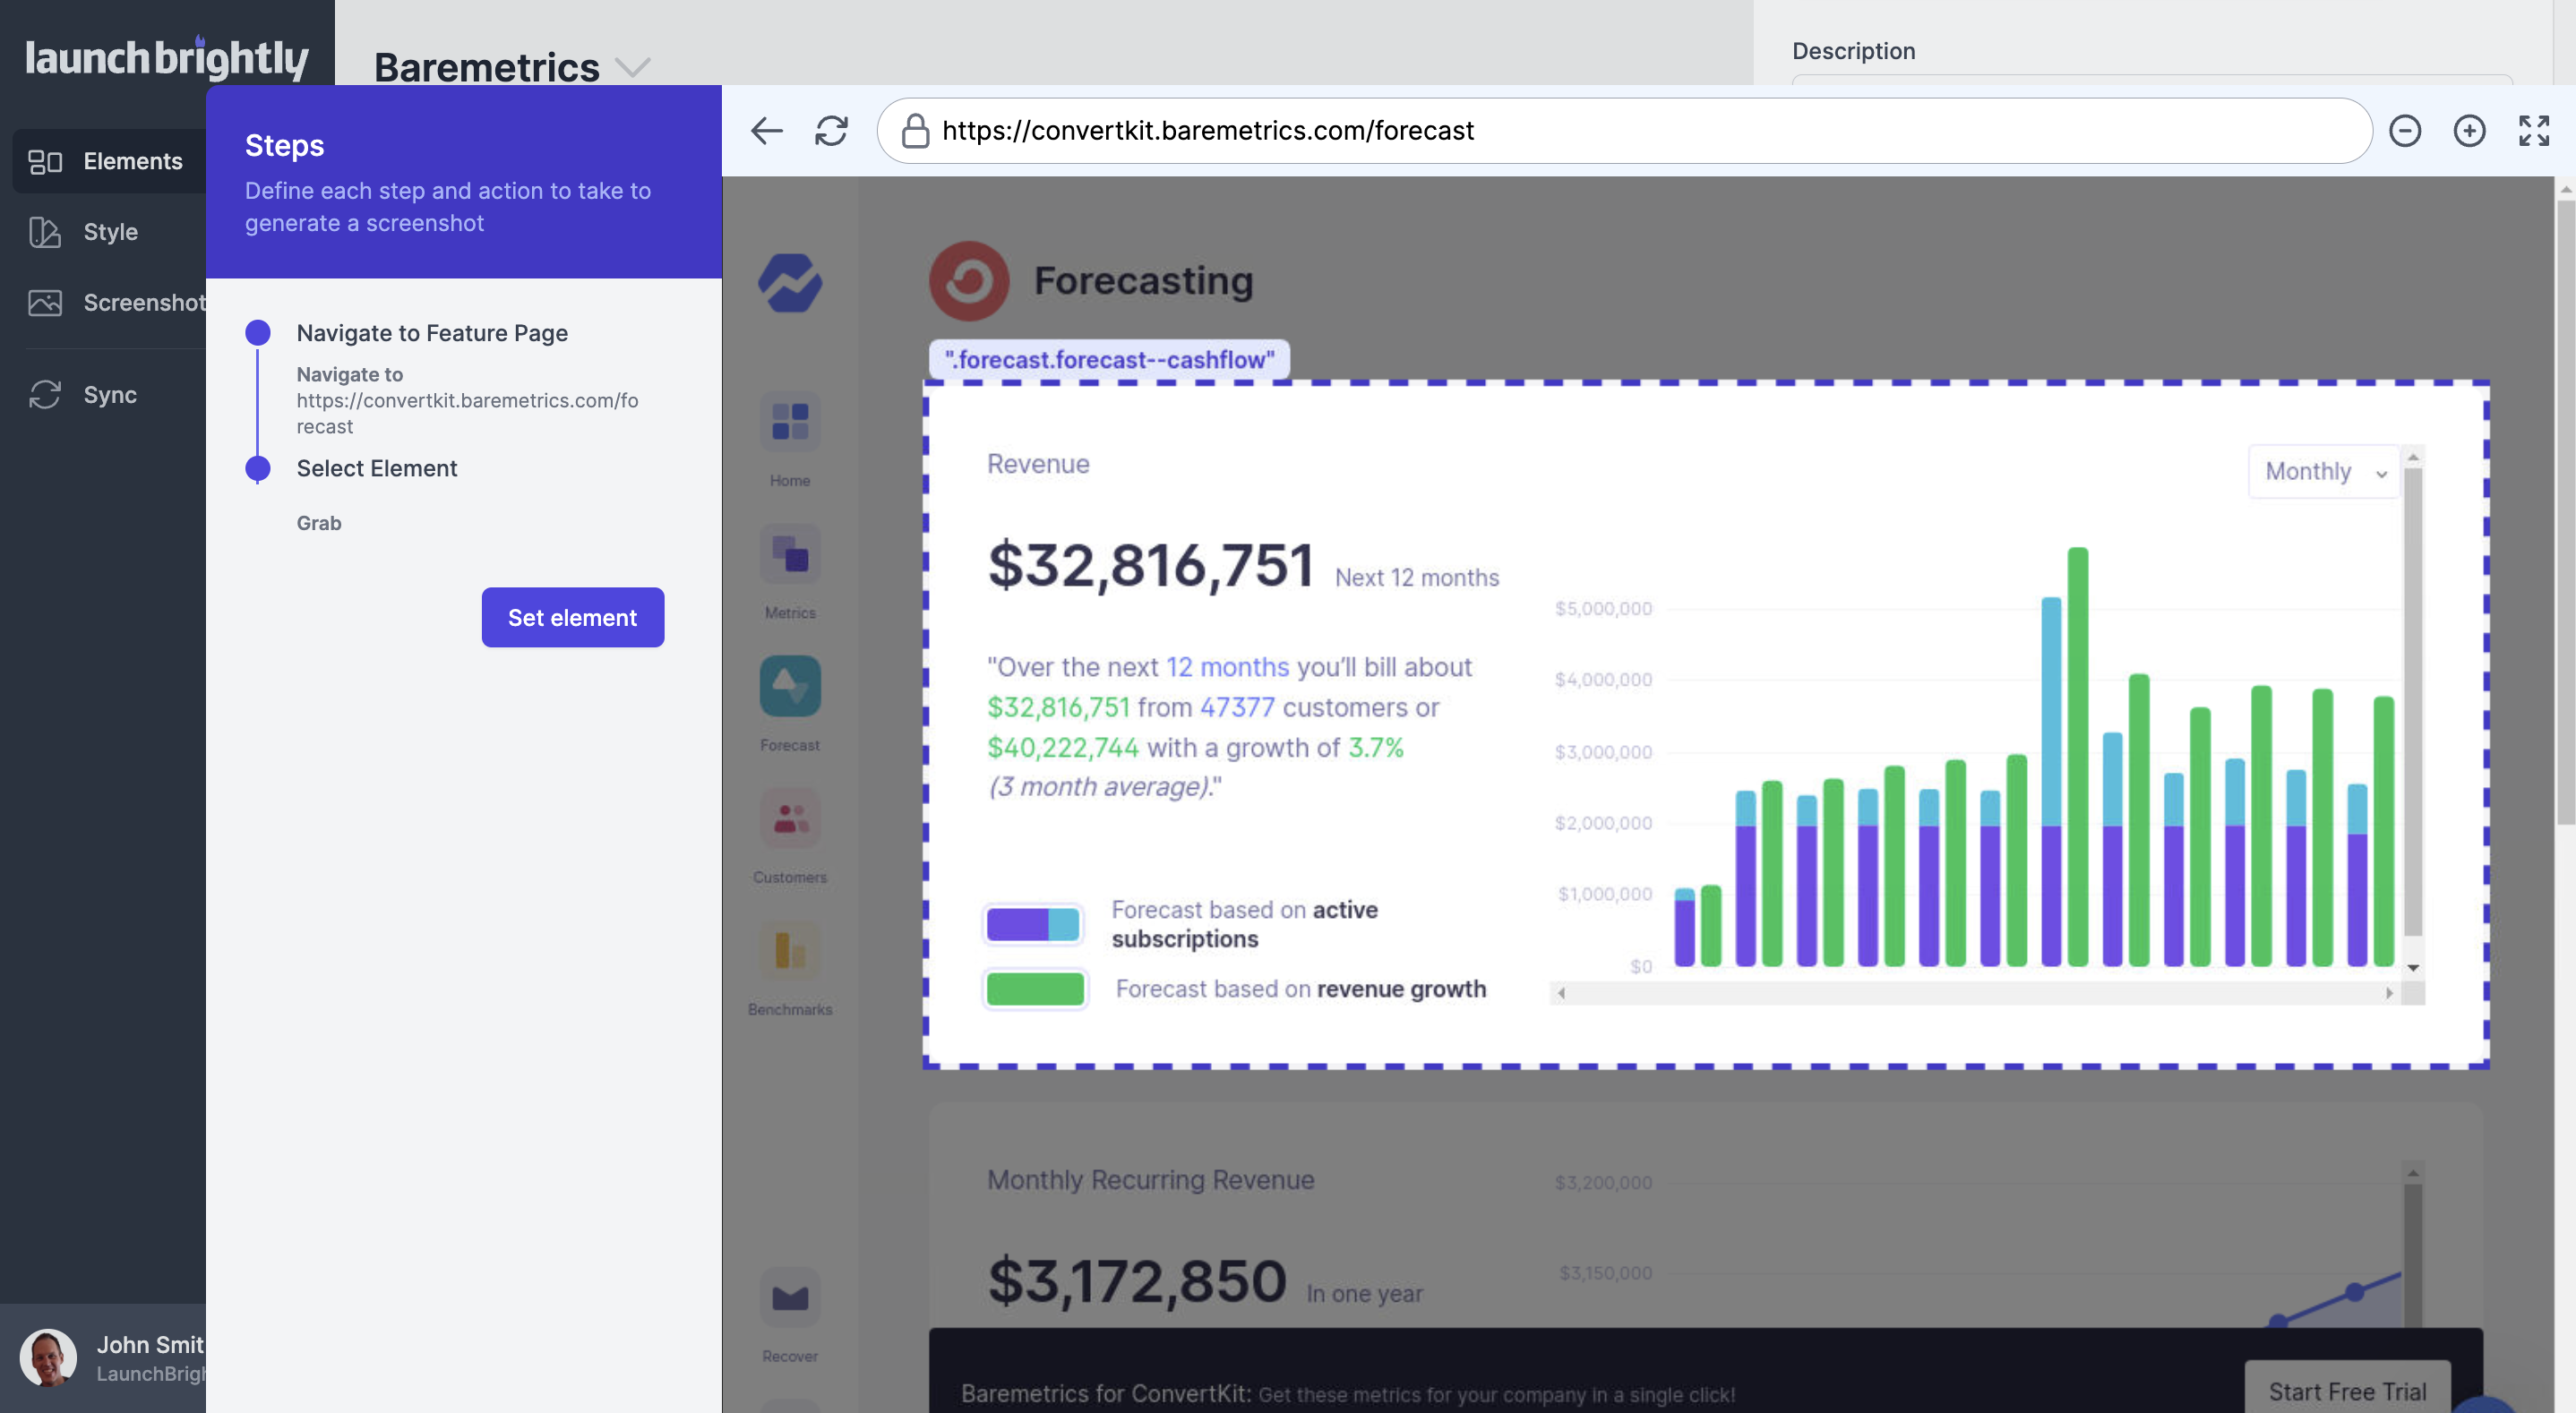
Once you have highlighted the Product Element you want to capture, select Set element.
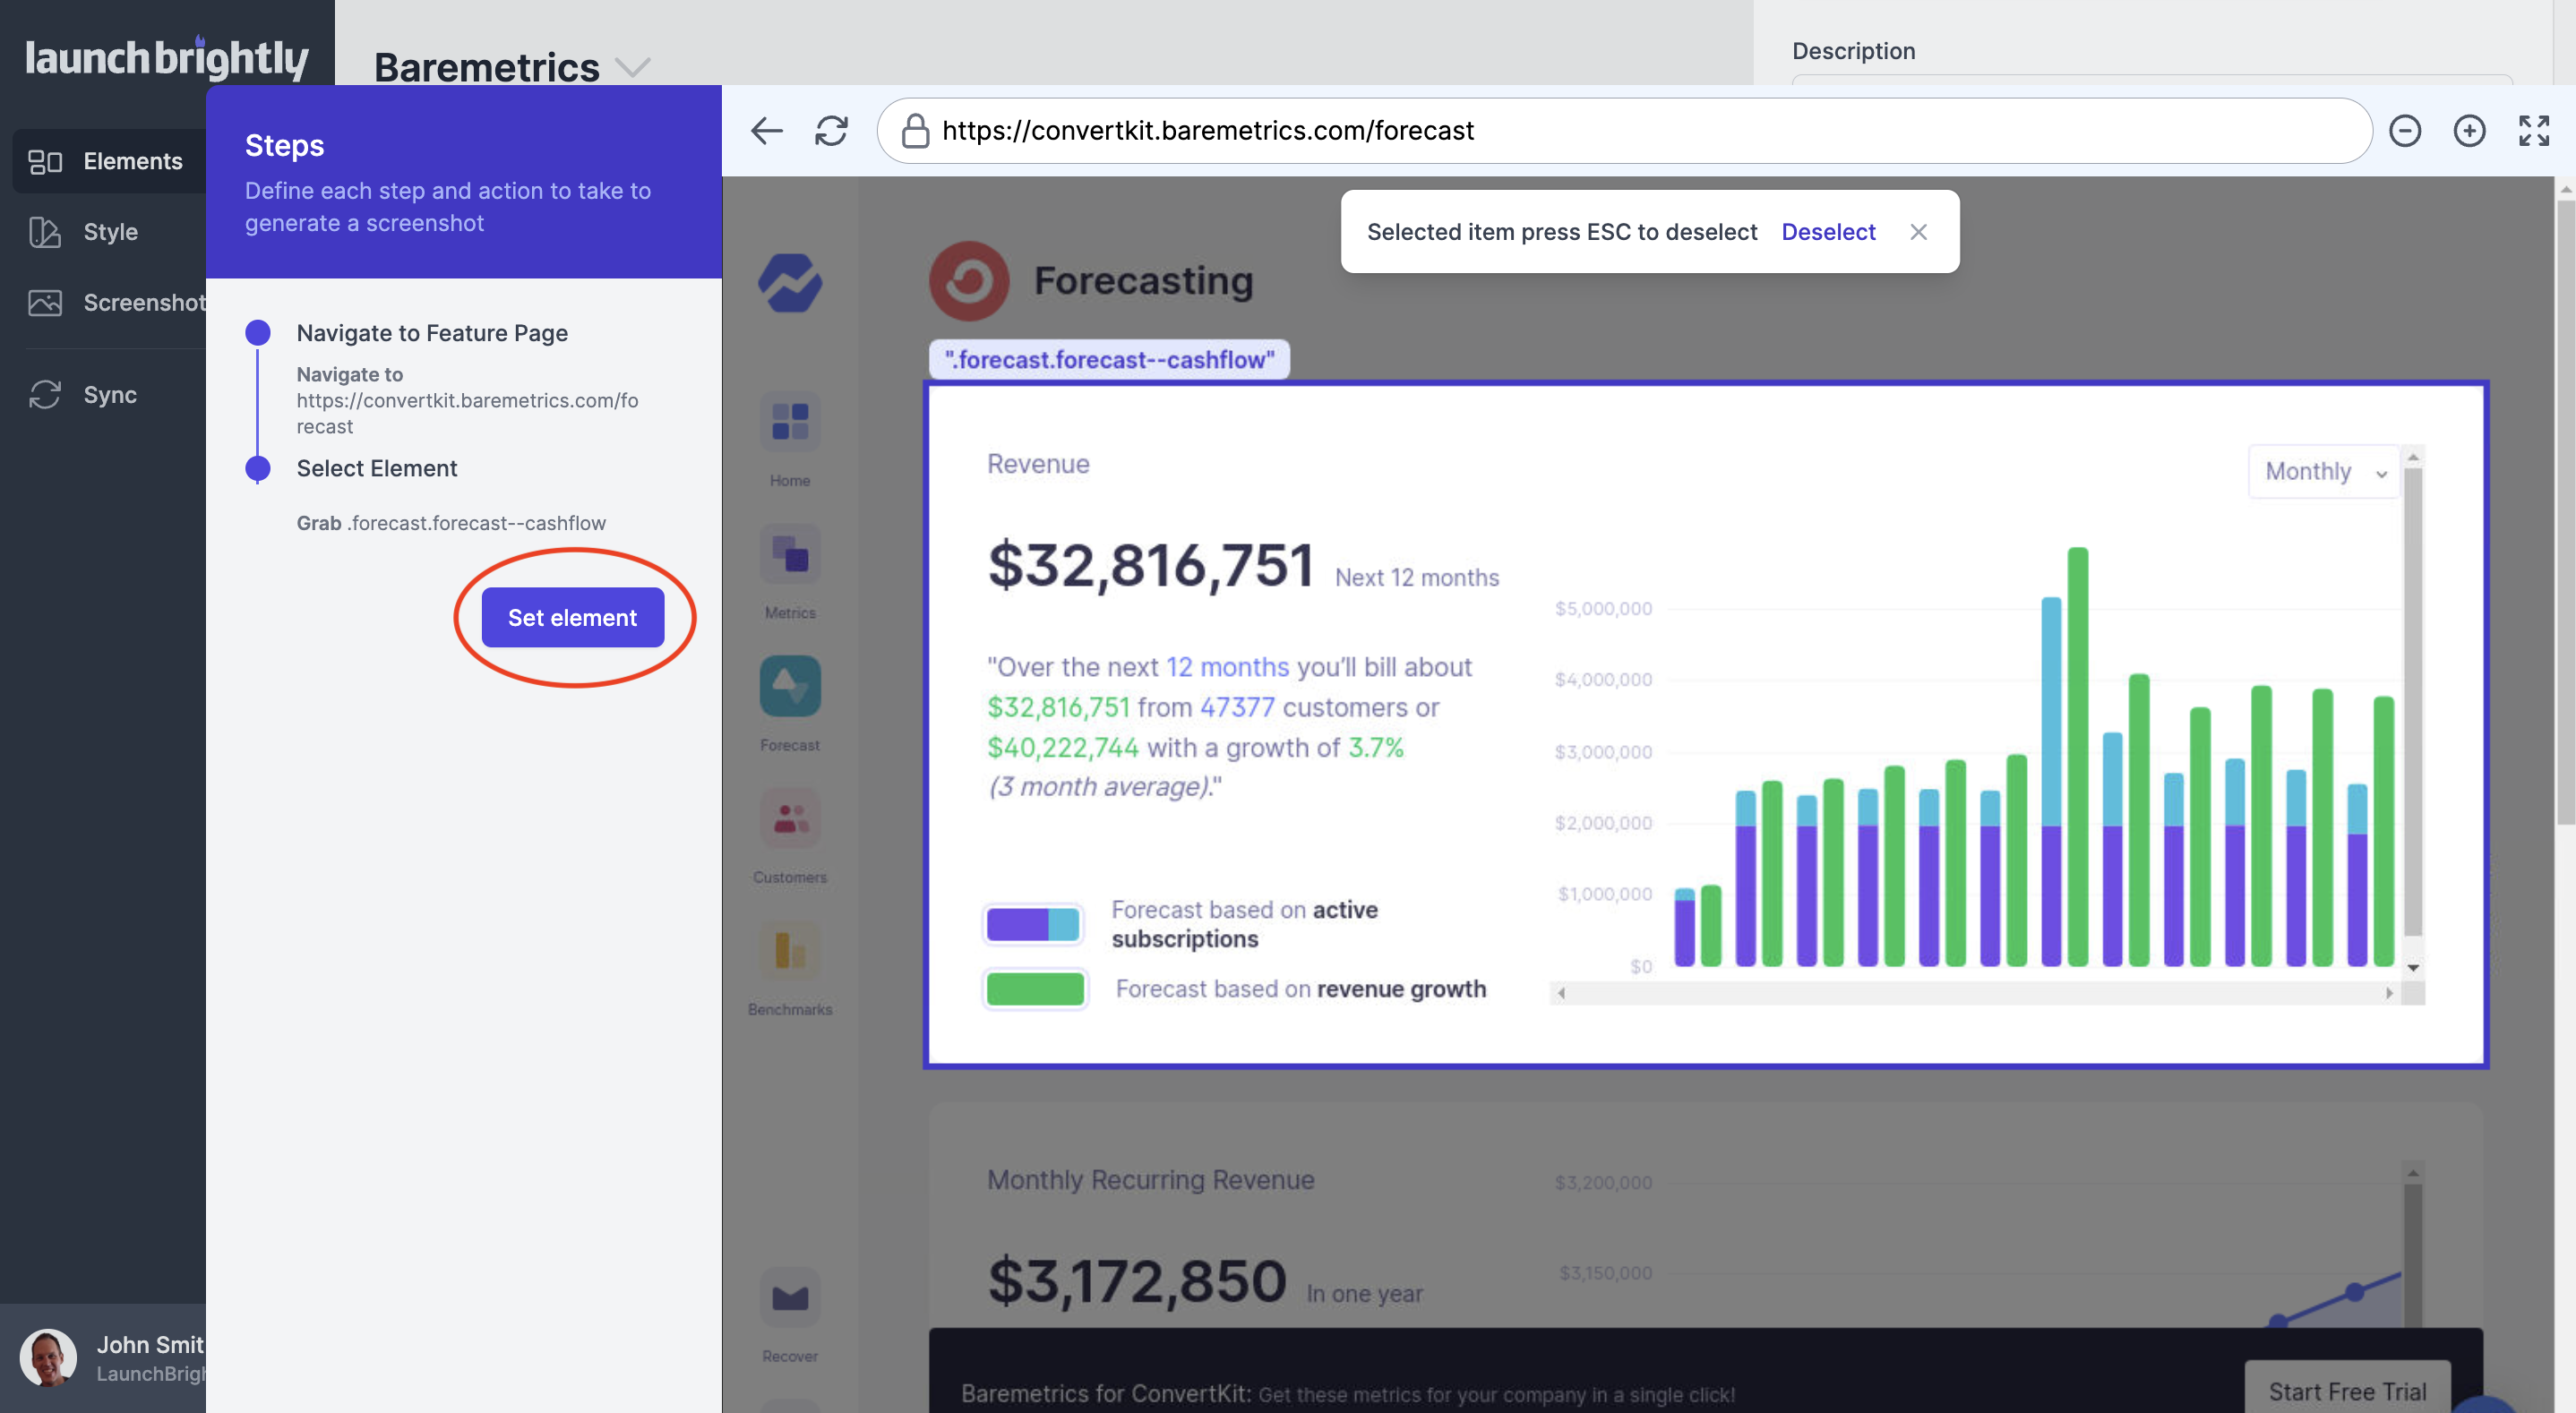
Coming soon
Once you have selected the Product Element you want to capture, you will be able to trigger a set of Enhancements to be applied to the screenshot. For example, you will be able to add annotations such as a red rectangle to highlight specific areas on the Product Element you want to call out, remove unwanted chat bubbles from appearing in a screenshot, and prime the image so the dropdown is showing or the input has illustrative text in it.
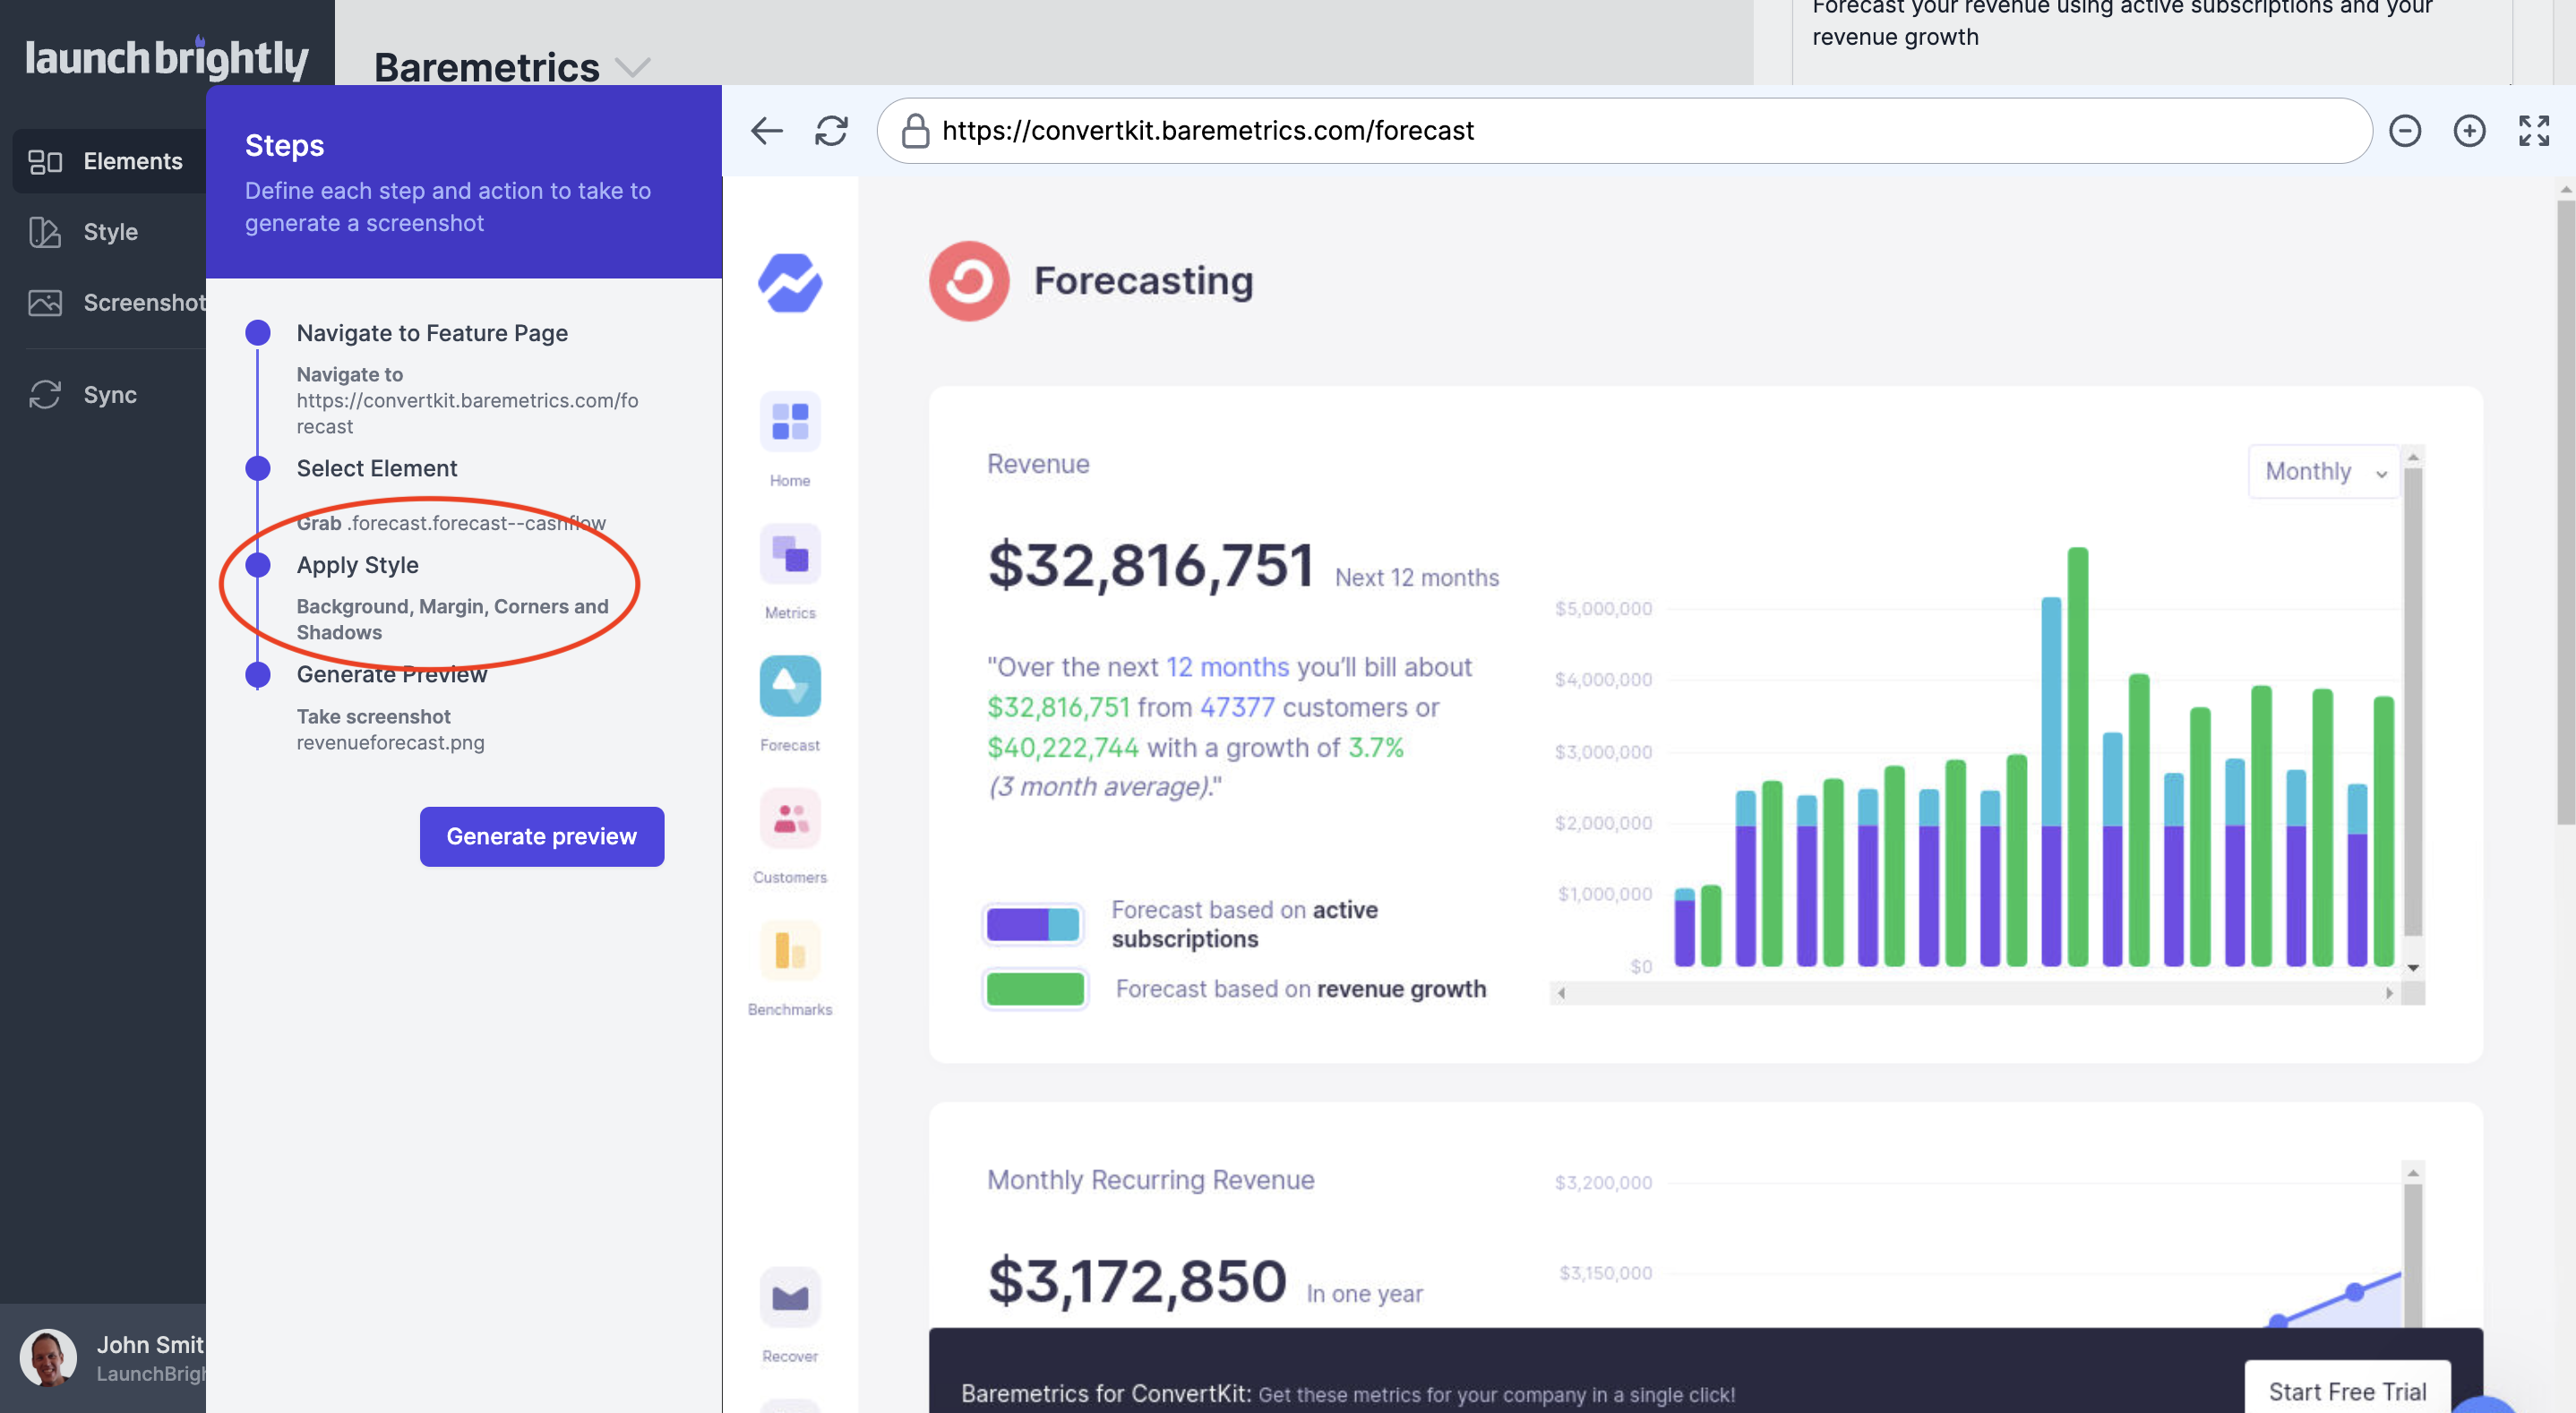
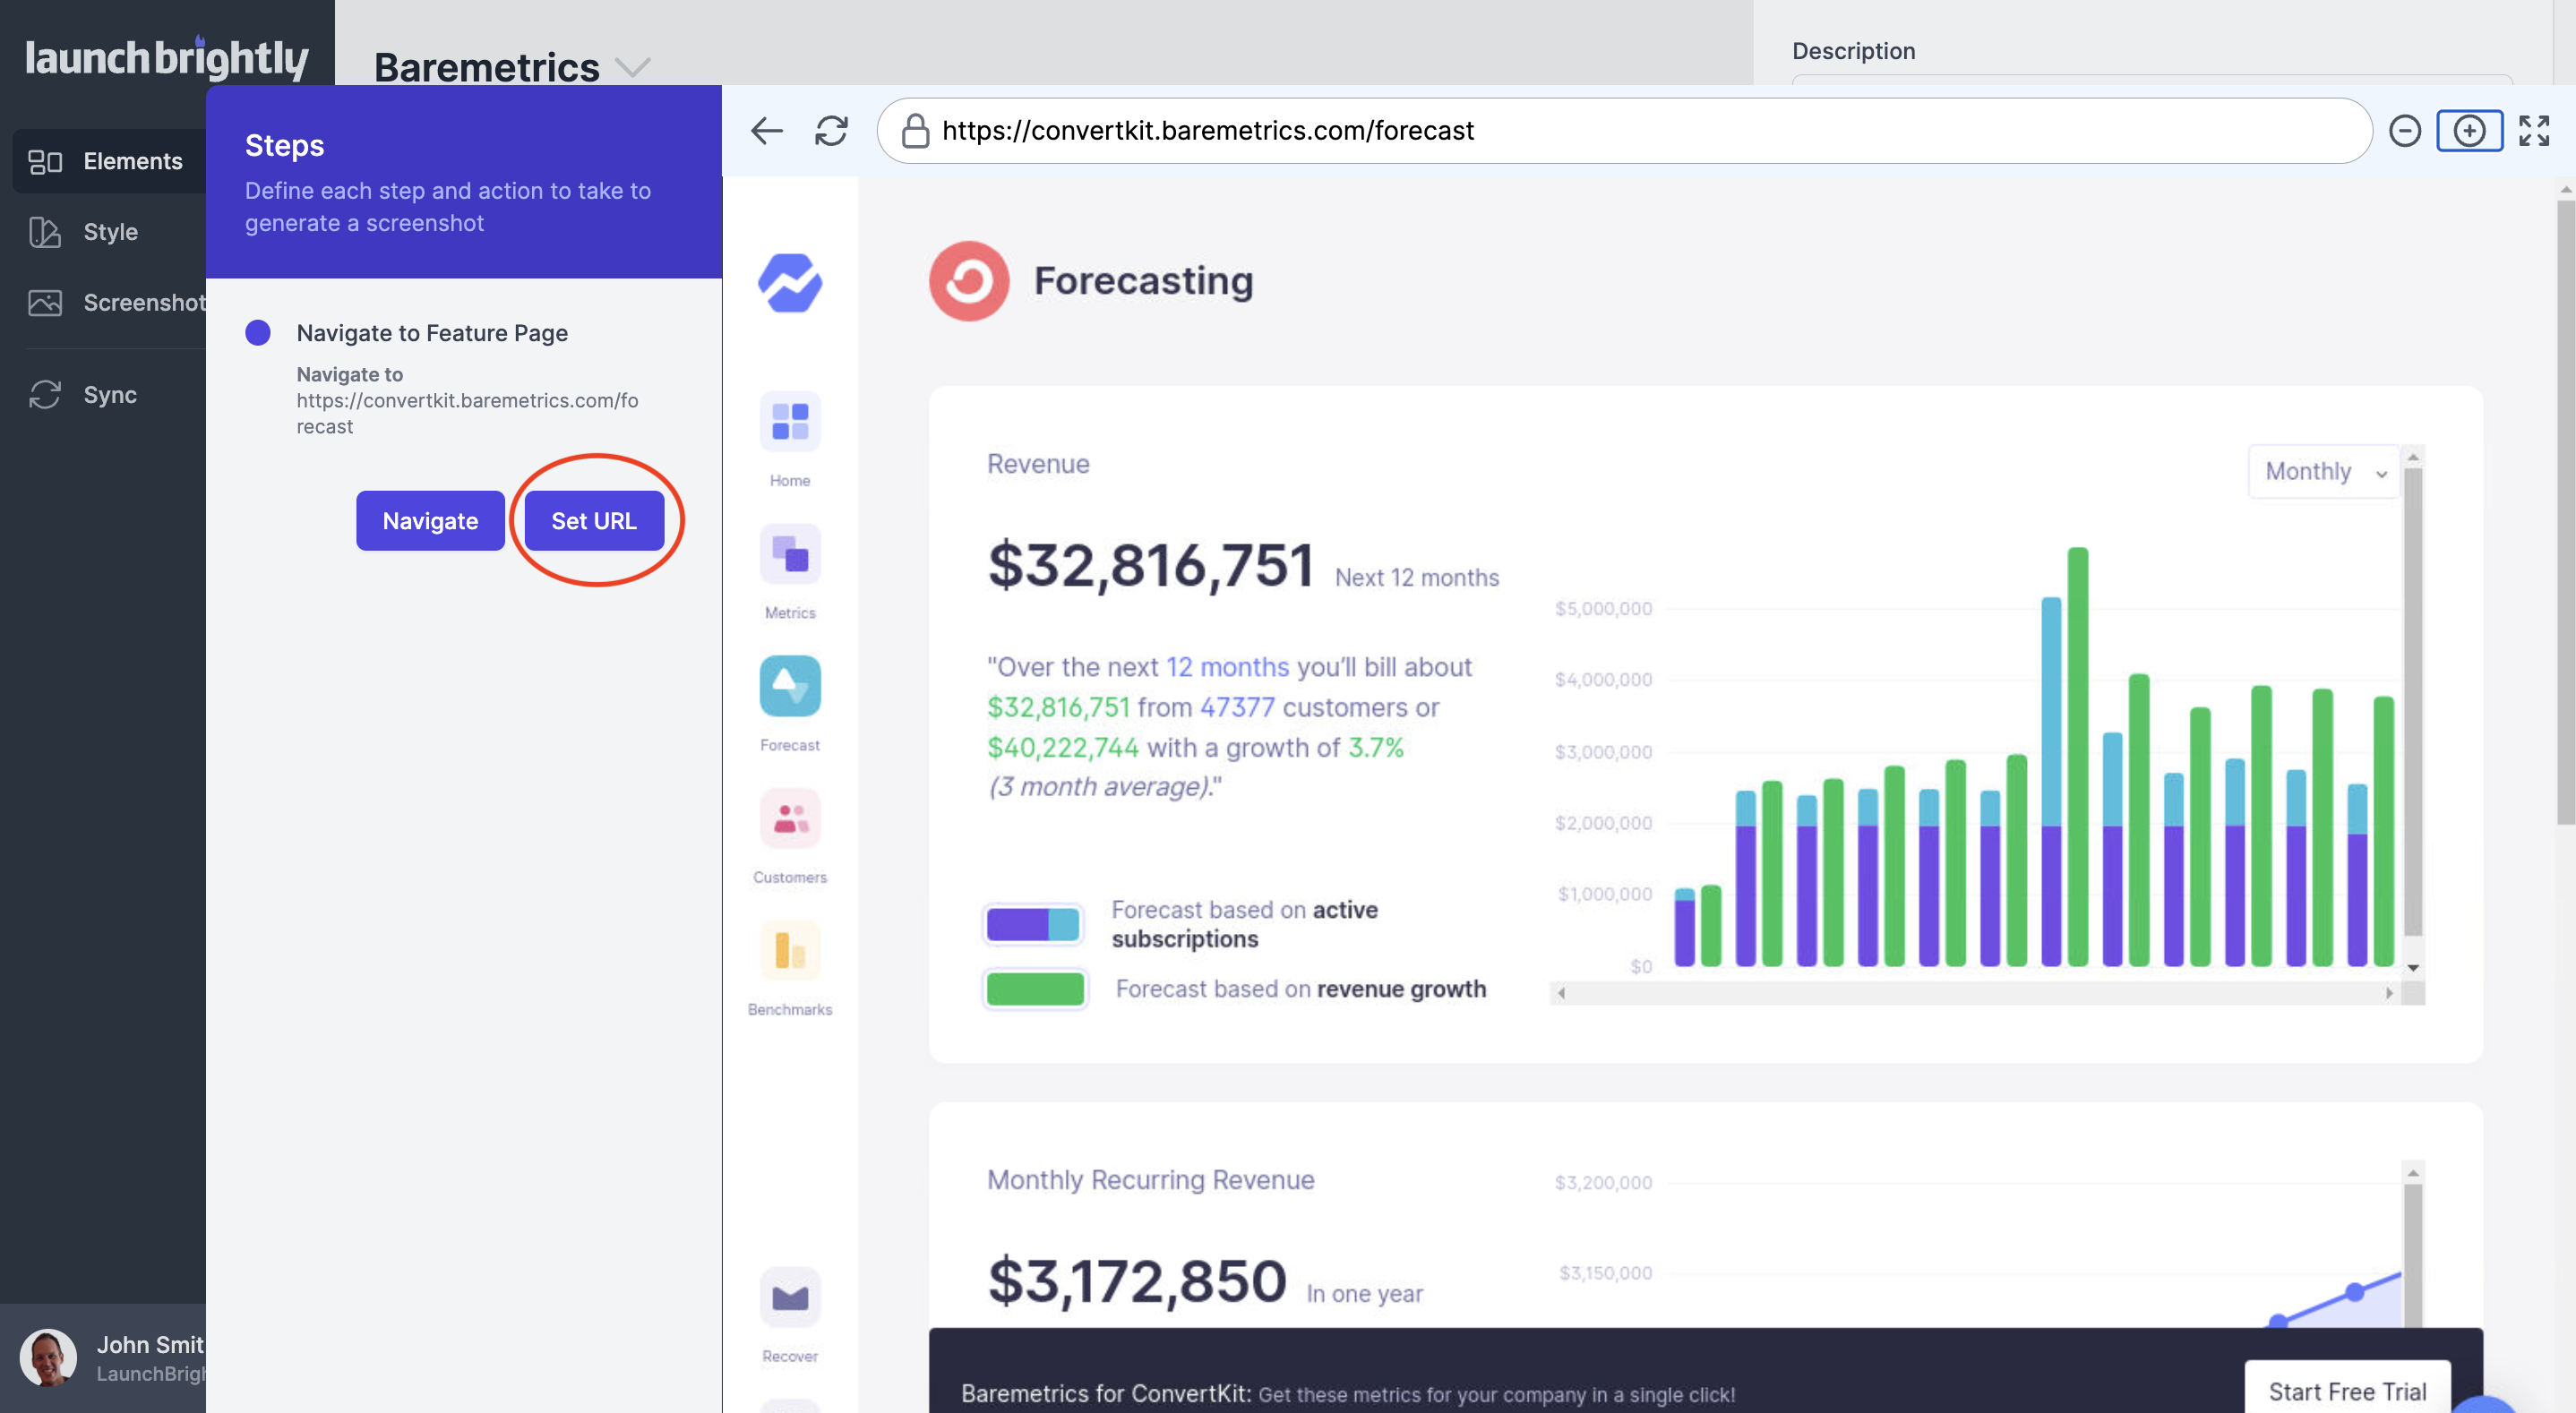
Now you have highlighted the Product Element you want to capture, the URL in your web application where it lives, and triggered a set of Enhancements to be applied, you can select Generate Preview to see a preview of the screenshot of your Product Element before saving.
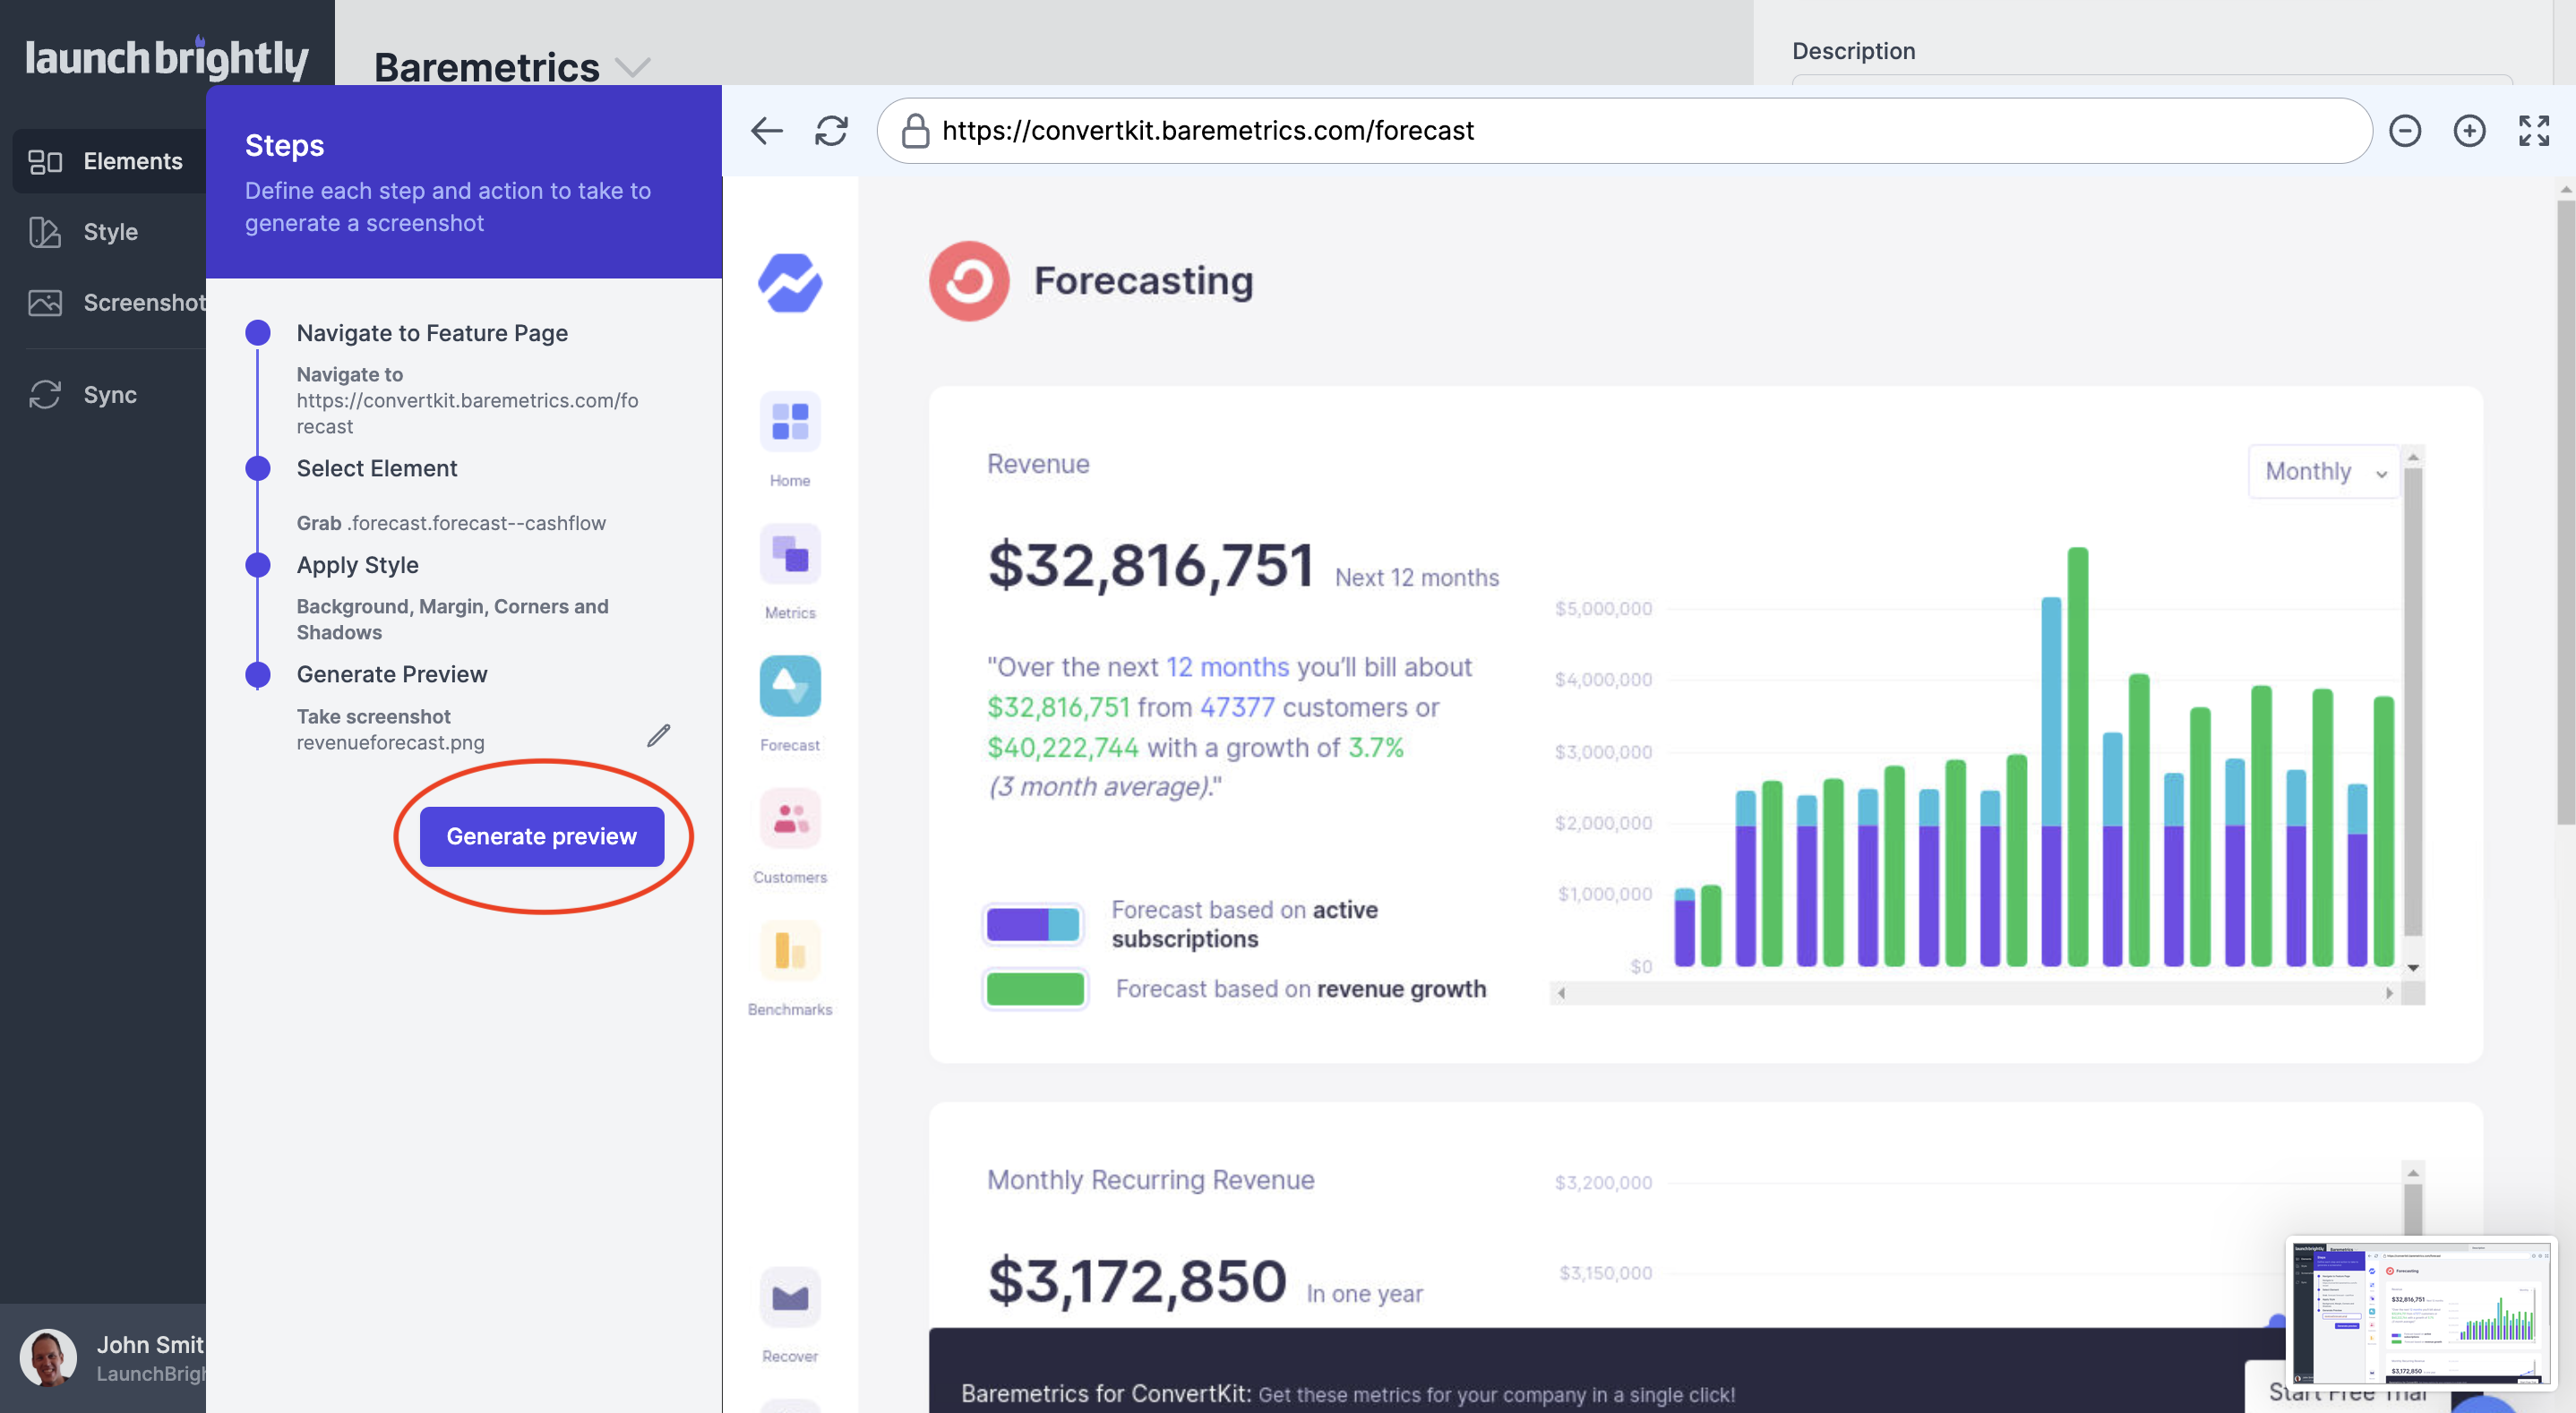
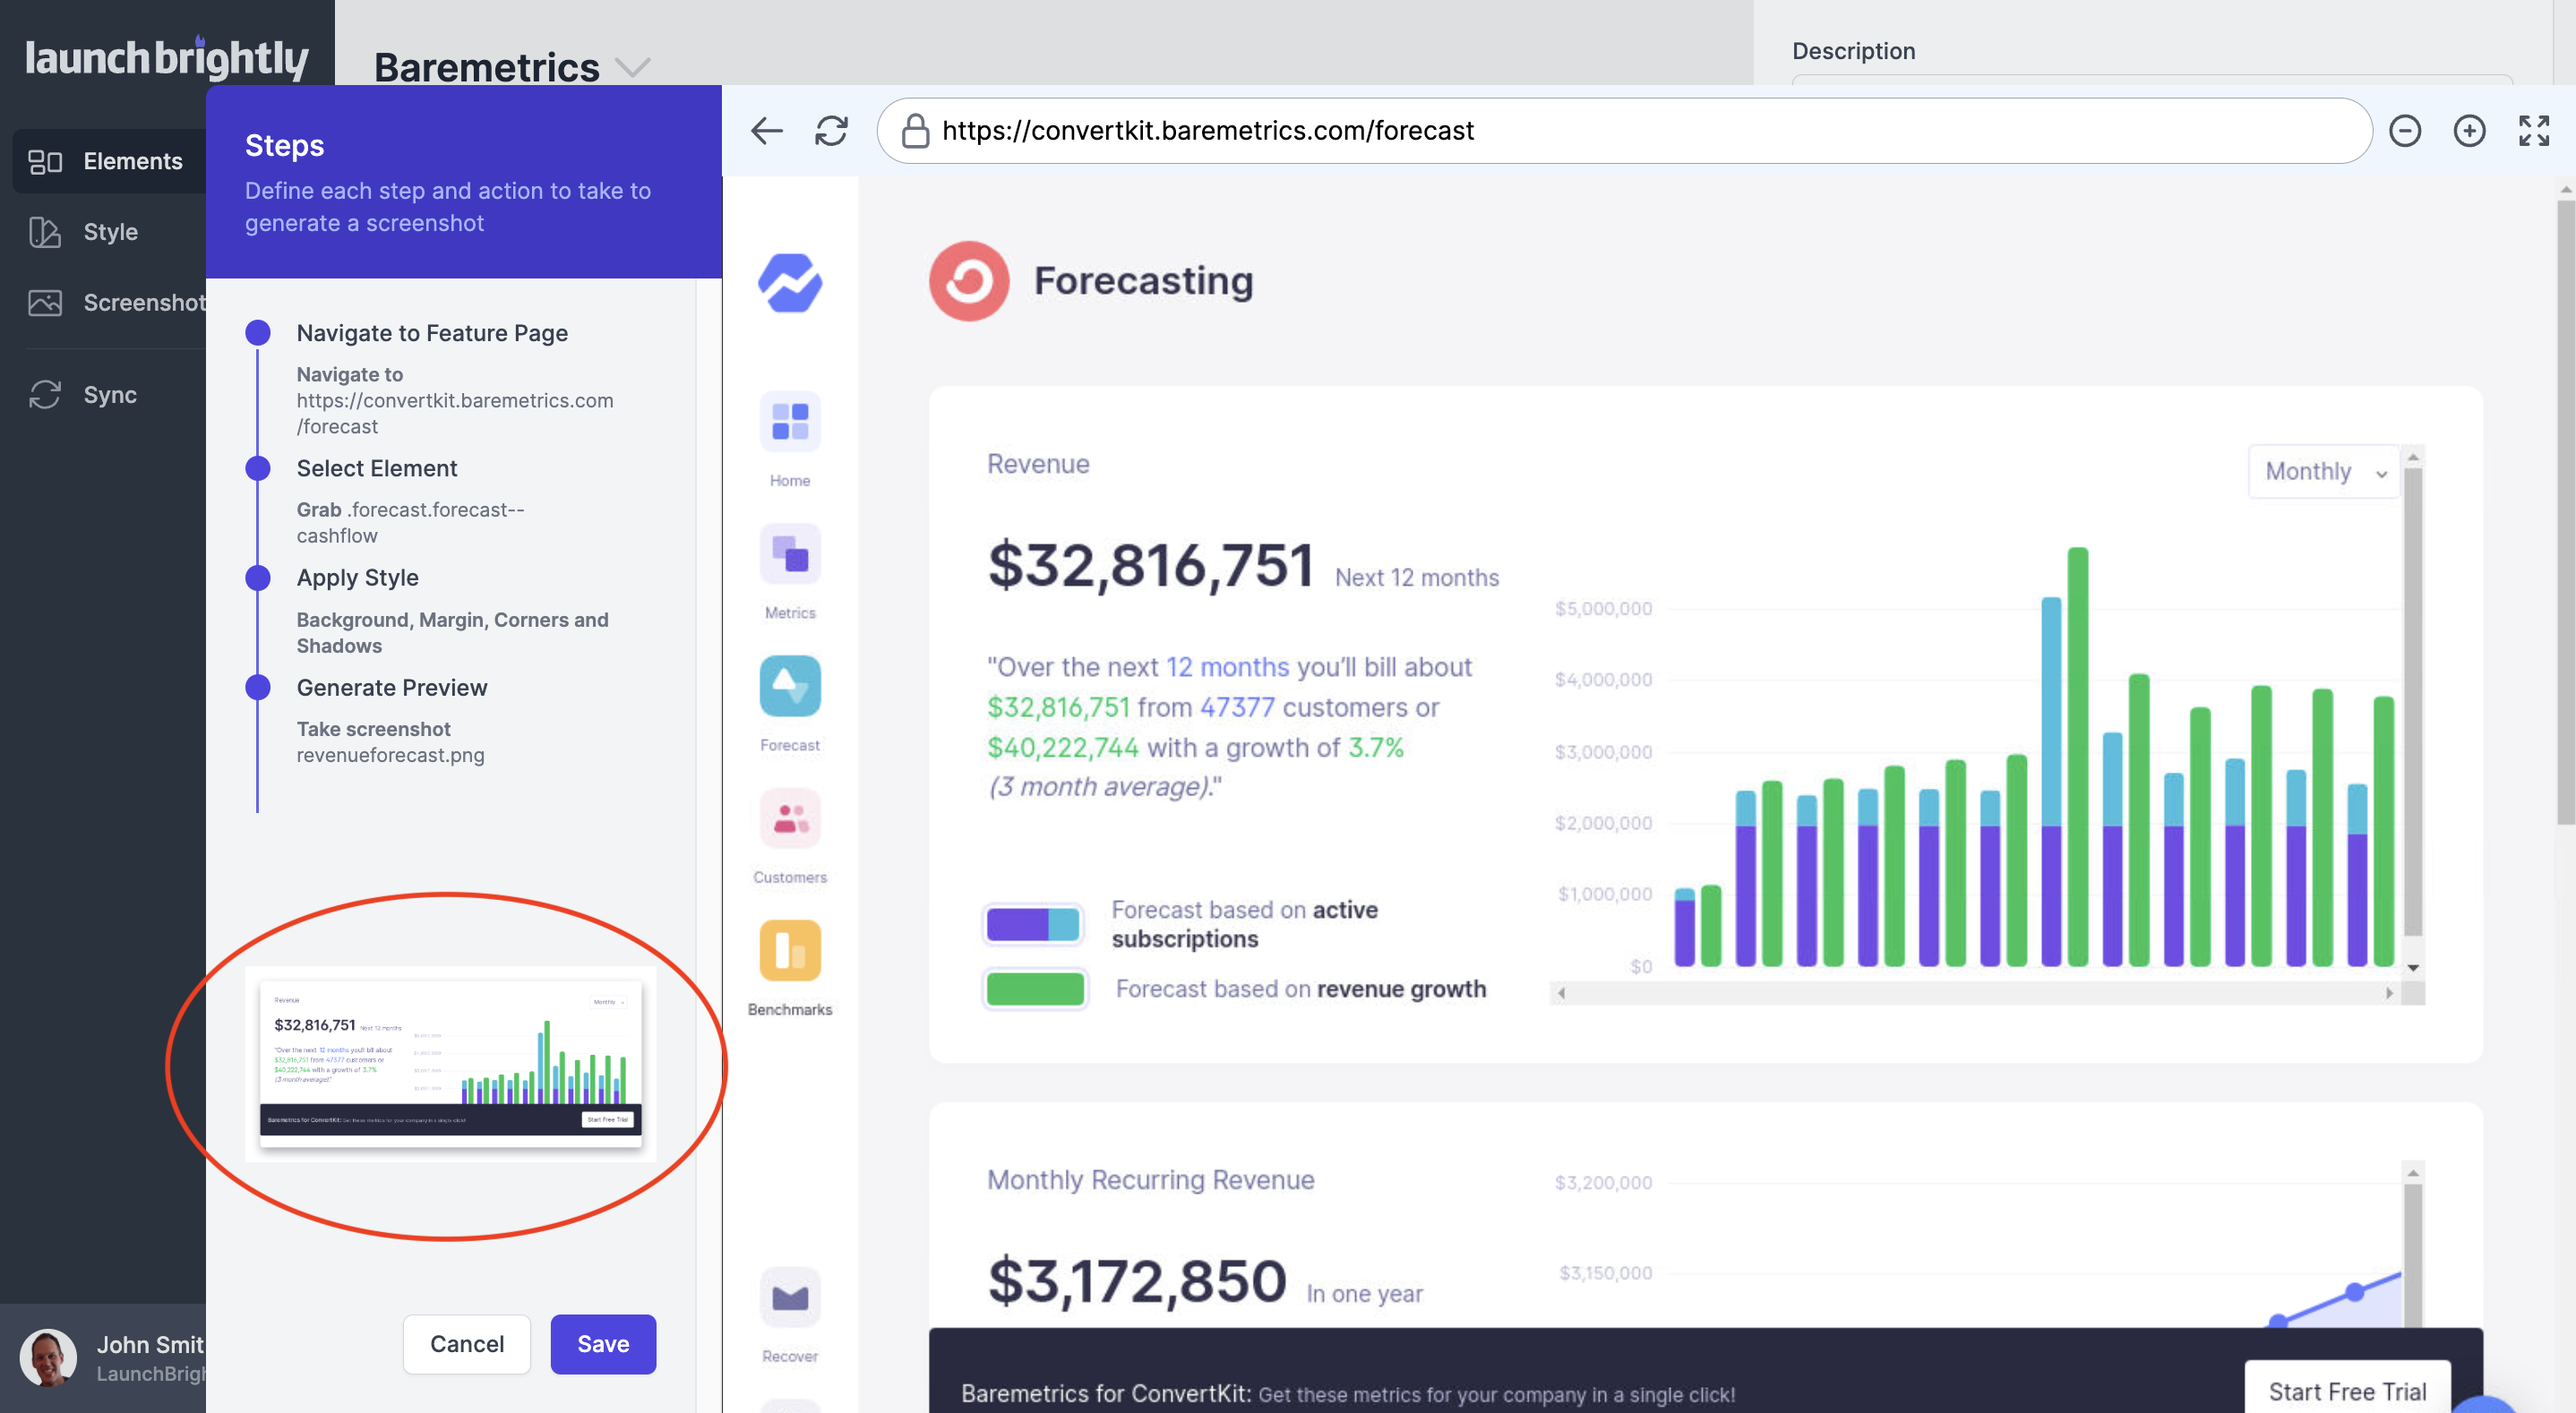
Finally, once you have finished reviewing the Preview click to Save your Screenshot Sequence.